The Windows registry is a group of databases placed in a hierarchical order to store configuration settings for applications, hardware information, low-level settings of the operating system, and managing other resources available on the Windows Operating System. The registry is available for all versions of Microsoft Windows, including Windows 7, Windows 8, Windows 10, etc.
At the time of installation, windows applications create a new subkey and write entries into these windows registries. As a result, it comprises various entries and values responsible for controlling the behavior of different configurations, location of the programs, user preferences, and data related to applications operating at a low level.
In simple terms, the Windows registry is the exact copy of the DNA for the Microsoft Windows versions. It carries all the information related to the hardware devices, software, operating system, third-party OS components, and applications such as device drivers and kernels.
Further, with the help of these registries, admins can easily monitor all the data available on the software programs or hardware devices and their settings.
It also contains a set of instructions in the registry keys, i.e., if you make changes to the information, the layout of the registry value controls will also get altered.
Windows registry is an essential part of your device. You won’t realize the changes until you reboot the system.
Generally, all versions of Windows do not exercise the Windows registry for storing information. In some cases, they use XML files while, in other cases, they store data in executable files as they are portable. Also, the location of storing physical registry files is different for all operating systems based on their windows version.
A few older versions like Windows 3.1.1 used .ini files for storing Windows configurations and settings. However, some still use .ini files but, in most cases, rely on the windows registry settings.
Generally, a user finds it difficult to perform changes directly to the applications. In that case, these registries are used by admins to make changes in the application of the OS. It also comprises a graphical interface referred to as Registry Editor, used for accessing the registries of different programs available on your system.
There is no need to download the registry editor to make changes to the registry. One can simply access it by running it or implementing Regedit at the Command Prompt.
Why should you disable network access to the registry?
Windows Registry comprises a lot of information, such as applications you install on the system, that require protection. If you don’t know how to handle the windows registry, look for guides that will direct you on how to use it.
But, ensure only an IT-savvy or highly experienced person must try to tamper with the settings as the Windows registry comprises a lot of crucial data. Avoid messing with the settings without the proper knowledge, or you’ll have to face heavy losses. If you know how to handle the registry, you can do great things to your PC, like speeding up the performance, personalizing the Windows experience to the next level, etc.
Using it without knowledge is not a threat, but one might create issues while modifying or editing the registry. To avoid any issues, we recommend limiting access to your registry so only authorized users can access and make changes to the registry files.
By launching the Registry Editor tool, users can easily access and configure registry settings. It may further cause problems to your system, especially if the user does not know how to manage the registry files. Hence, it is essential to disable the access before you lose any crucial data.
How to disable network access to Windows Registry?
There is always a possibility that someone could seriously harm your computer by editing the registry. So, it is a good idea to keep your registry safe. There are two methods you can use to disable network access to Windows Registry.
1. Using Windows System Services
You can disable the Windows Remote Registry system service to disable remote access to your registry. Follow the below steps to disable the Remote Registry service.
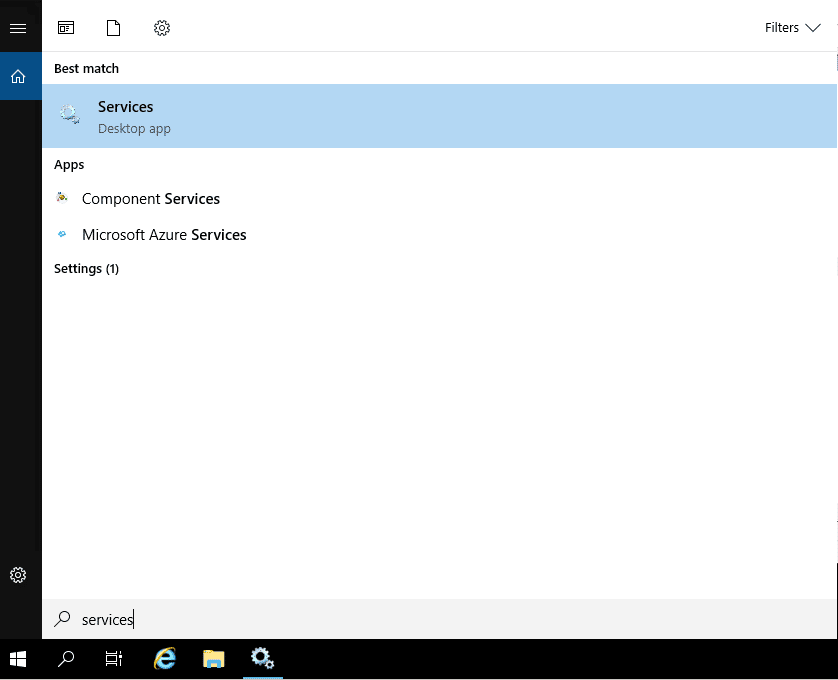
- Search for services in the Windows search bar. You should see the following screen:
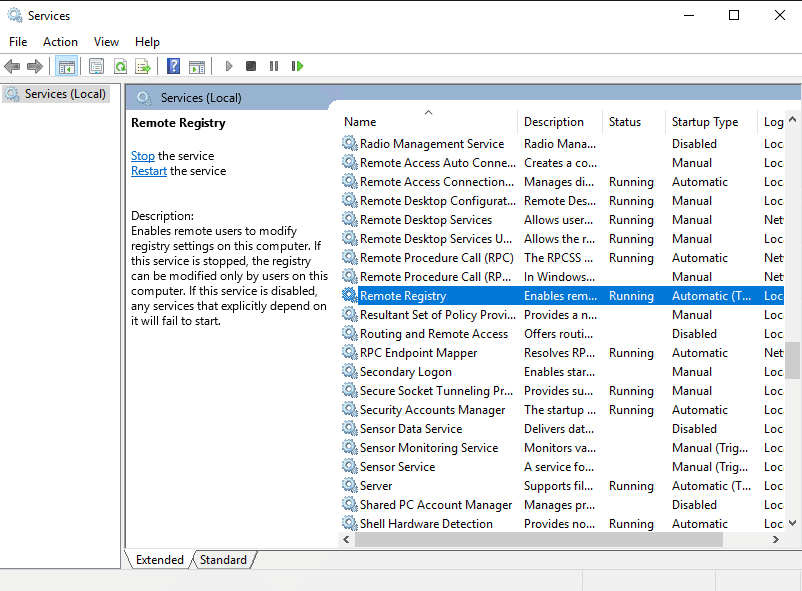
- Click on the Services to open the Windows Services page:
- Find Remote Registry from the list of services in the right pane and double-click on it.
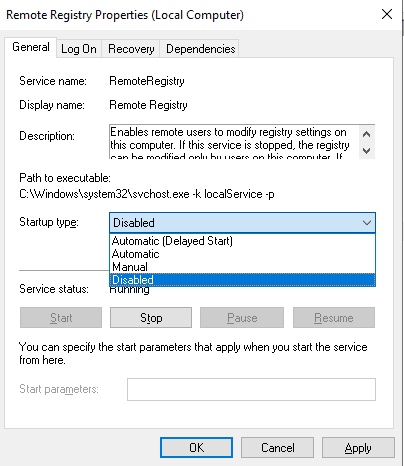
In the General tab, switch Startup type to Disabled. Then, click on Apply and restart your computer to make the changes.
2. Using Windows Registry Editor
You can also use the Windows Registry Editor to disable remote access to your registry. Follow these steps to disable network access to your registry:
- Search for regedit in the Windows search bar. You should see the following screen:
- Click on the Registry Editor to open the Registry editor. Click on the HKEY_LOCAL_MACHINE => SYSTEM => CurrentControlSet => Services => RemoteRegistry. You should see the following screen:
- Double click on the REG_DWORD entry called Start. You should see the following screen:
- Delete any other number and simply type 4 then click the OK button and restart your computer.
3. Disable Registry Keys
It is also a good idea to disable access to the registry editor for security purposes. You can follow the below steps to disable the Registry keys:
- Search for regedit in the Windows search bar.
- Click on the Registry Editor to open the Registry editor.
- Click on the HKEY_LOCAL_MACHINE => CurrentControlSet => Control => Keyboard Layout.
- In the Edit menu, press New => Binary Value then provides the name of the “Scancode Map” and press the enter key.
- Set the value to “00000000000000000300000000005BE000005CE000000000” then press the OK button.
- Close the registry editor and restart your system to apply the changes.
4. Disable Registry Access via Group Policy
You can also disable the Registry editor using the Windows Group Policy. Follow the below steps to disable the Registry access:
- Search for group policy as shown below:
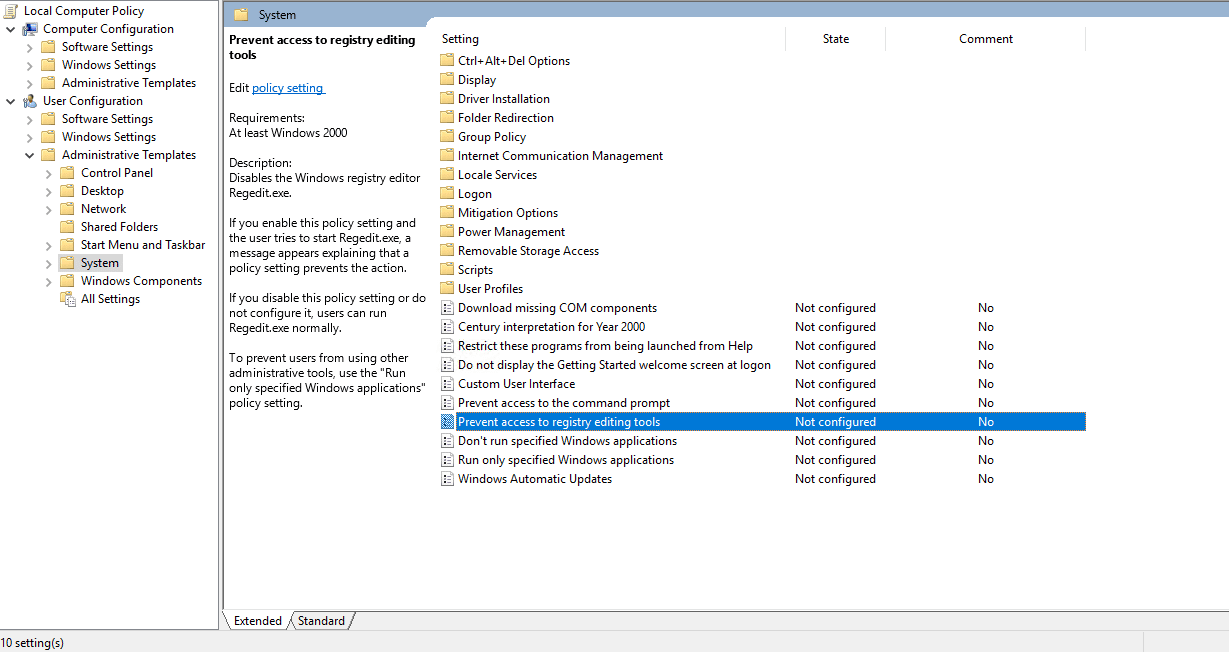
- Click on the Edit group policy to launch the Group Policy interface. Click on the User Configuration => Administrative Templates => System:
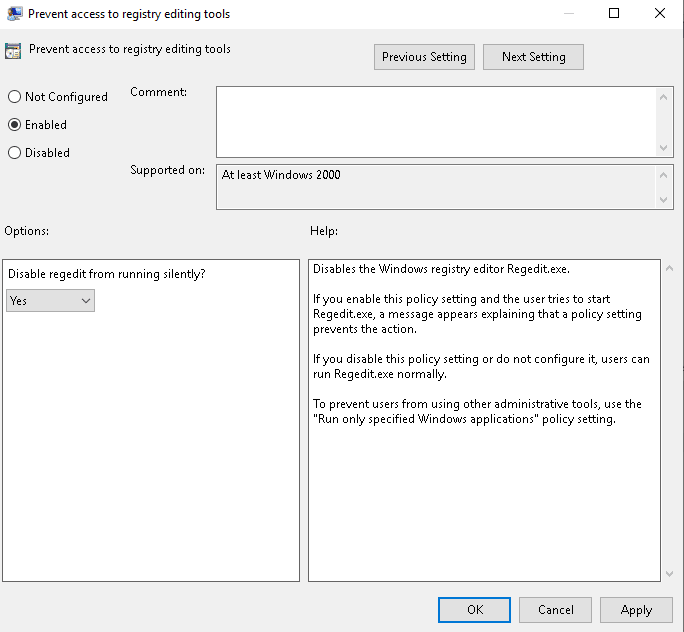
- Next, double click on Prevent Access To Registry Editing Tools and enable it.
- Click on the Apply button then restart your system to apply the changes.
Conclusion
In this post, we explained what Windows Registry is and how to disable network access to Windows Registry. We also explained two methods to disable network access to Windows Registry. I hope this will save you a lot of time.


