What is SFTP?
SFTP stands for Secure File Transfer Protocol, a network protocol that securely transfers files on both the local and remote systems. It is also referred to as SSH File Transfer Protocol because it comprises Secure Shell (SSH) security components that ensure all your files are transferred securely over the TCP/IP network.
Most companies trust SFTP because it offers a high level of security and protects data from exposure to unauthorized parties. Also, users have full access to select the authentication level when transferring files over the web using SFTP. Another benefit of choosing SFTP over other protocols is that no one can trigger or turn off the SFTP’s encryption system.
All you need is to have an SFTP client and an SFTP server to use the Secure File Transfer Protocol.
If you want to protect your data from malicious attackers over the Internet, make use of SFTP as it offers a high level of security and encrypts the data stream.
How does SFTP Works?
SFTP (Secure File Transfer Protocol) works in a client-server architecture and ensures all your files are securely transferred over the internet. It uses a combination of the SSH protocol and public-key cryptography to establish a secure connection when transferring files.
As you connect to an SFTP server, you authenticate using a username and password, or a public key. Once authenticated, you can then transfer files to and from the server. SFTP uses a separate channel to transfer data, so your data is encrypted and secure.
SSH keys, on the other hand, help create a more secure connection and must be created in advance to prevent imposters from connecting with the SFTP server.
The supported encryption methods ensure that all your data is safe and cannot be read by unauthorized users.
What is Cygwin?
Cygwin is free, open-source software that provides a Unix-like environment for Microsoft Windows. It consists of a collection of programming and operating system tools that help compile Unix-like applications and run them on Windows. Cygwin is produced by Cygnus Solutions, a subsidiary of Red Hat.
It consists of a library that provides a Portable OS Interface, or POSIX-compliant API (Application Programming Interface) on top of the Win32 API, and a set of tools that emulate Unix programs.
The Cygwin API provides a wrapper around the Win32 API that allows Unix-like operating systems to be emulated within Windows. It enables software designed for Unix systems to be recompiled and run on Windows.
Released under the GNU Lesser General Public License version 3, the Cygwin environment is available to users in two versions – the full 64-bit version and a 32-bit version (soon phasing out). To install or download a basic Cygwin environment, all you need to do is run the setup-x86_64.exe program or access it via the Windows command shell.
The advantage of having Cygwin is you can shell your scripts across Windows, Mac OS X, and Linux platforms. Additionally, it is lightweight, easily portable, and offers access to scripting languages, including Python, Ruby, and Perl.
In this post, we will show you how to create an SFTP server using Cygwin on Windows.
Key Features of Cygwin
Cygwin is an open-source tool for users who use the Windows operating system and Linux on a regular basis, and who want the power of a Linux shell running inside Windows. Cygwin is composed of a set of programming tools and OS tools which helps in building Unix-like applications and running them in Microsoft Windows.
Cygwin is a Unix-like environment for Windows. It provides full functionality for the POSIX API, and includes the following features:
- Cygwin is a free, open-source software that provides a Unix-like environment and set of software tools for users using any of the modern versions of the Windows operating system.
- A Linux API emulation layer that supports the Linux kernel, system calls, file formats, and other features.
- Offers Full access to all of the Unix tools in Cygwin’s distribution.
- The ability to run both Windows and Cygwin applications on Windows systems.
- Support for POSIX style shared libraries
- Support for a wide variety of compilers
- Support for most popular programming languages
- Cygwin/X may take control of the entire display when in fullscreen mode, which is especially useful when connecting to a remote XDM server.
- Supports Clipboard Integration
- You can enable X11 tunneling of apps from your Windows PC to other computers on your network by using Cygwin’s OpenSSH package and its sshd daemon.
Advantages of Cygwin
Cygwin is a free Unix-like environment and command-line interface for Microsoft Windows. It provides native integration of Linux applications and other Unix-like utilities with the Windows operating system.
It offers a traditional, command-line user interface, with many similarities to the classic UNIX shell. Cygwin includes a simple window manager but does not include desktop environments such as GNOME or KDE found in Linux distributions.
Cygwin includes a large number of GNU packages, including bash, Coreutils, grep, gawk, sed and tar among others.
Cygwin is composed of a library for Emulating the Unix System, Cygwin1.dll, along with GNU and other free software applications organized in a wide range of optional packages. In this case, Cygwin provides a convenient way of installing, configuring or developing for Hadoop within the emulated environment on the Windows-based OS.
Cygwin can be installed on any typical Windows machine in minutes and allows users to experience the Unix UI, and run many popular Unix programs directly on a Windows desktop.
Another benefit of having the Cygwin environment is that you can run your scripts in the command shell on Microsoft Windows, Mac OS X, and Linux platforms.
You can run much of your work on Windows, but you still have the ability to switch to the Cygwin bash window for command-line operations. One very nice aspect of having your Windows environment blended is the fact that you also get to use the command-line commands from Windows. Instead of installing packaged versions of utilities that are all being ported over to Cygwin, all from different vendors, you can stick with one installer and a single emulated environment.
Install Cygwin on Windows
First, you will need to download and install Cygwin on your Windows server machine. Follow the below steps to install Cygwin:
Step 1 – Visit the Cygwin official download page and download the latest version of Cygwin on your server.
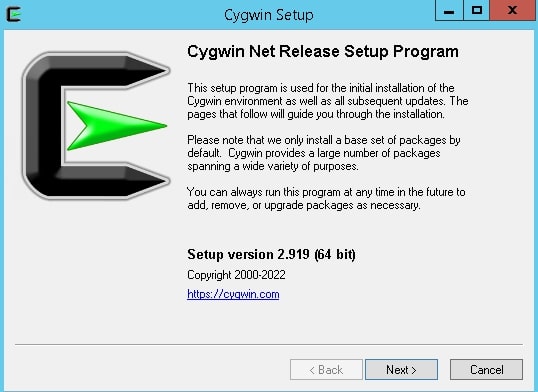
Step 2 – Once the Cygwin is downloaded, double-click on the downloaded file to start the installation. You should see the following screen:
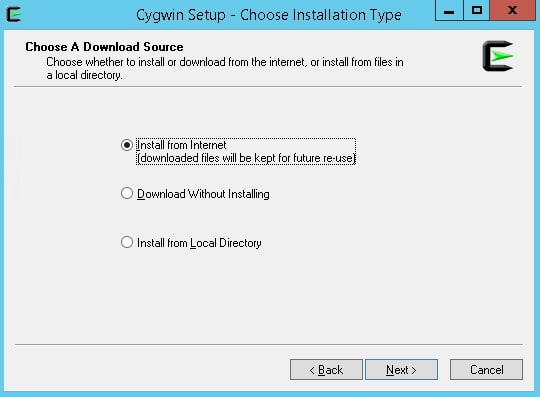
Step 3 – Click on the Next button. You will be asked to choose the installation source as shown below:
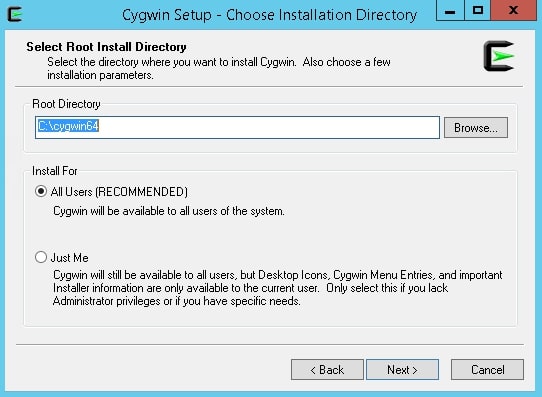
Step 4 – Choose “Install from the internet” and click on the Next button. You will be asked to choose the installation directory:
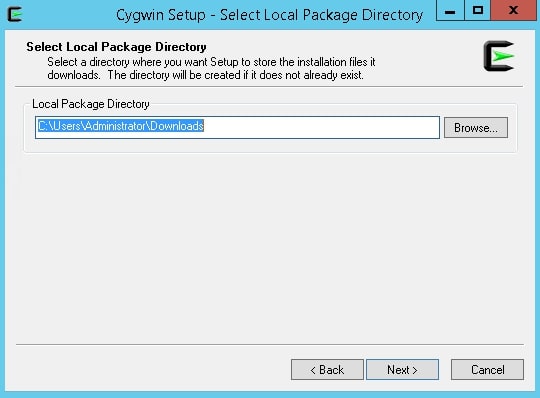
Step 5 – Define your installation directory path and click on the Next button. You will be asked to define the local directory:
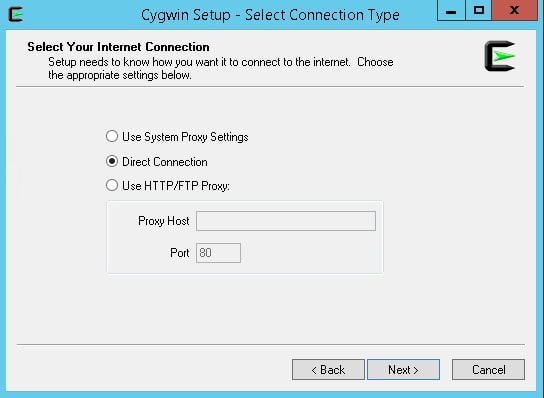
Step 6 – Select your preferred directory and click on the Next button. You will be asked to select the Internet connection:
Step 7 – Select Direct Connection and click on the Next button. You will be asked to select the download mirror:
Step 8 – Select your desired mirror and click on the Next button. You will be asked to select a package that you want to install:
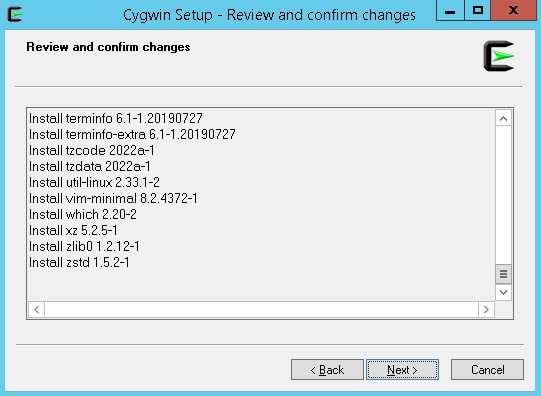
Step 9 – Select OpenSSH and click on the Next button. You will be asked to review and confirm the installation.
Step 10 – Click on the Next button. You will be asked to create a shortcut icon:
Step 11 – Select your preferred options and click on the Finish button to finish the installation.
Configure an SFTP Server
After installing Cygwin, you will need to set up an SFTP server using Cygwin.
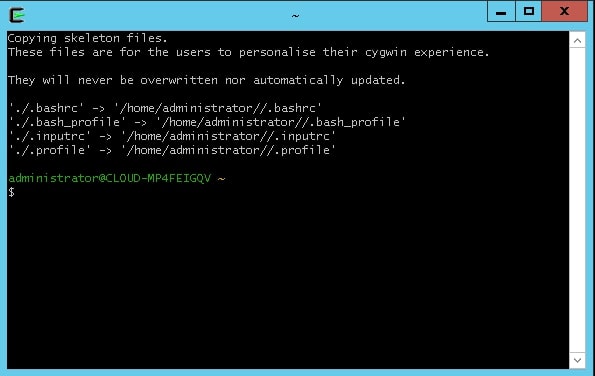
Go to the Windows Desktop => right-click on the Cygwin shortcut icon and click on the Run as an Administrator.
This will open the Cygwin as shown below:
Next, you will need to create a password and group file to store the user and group information. Run the following command in the Cygwin terminal to create a passwd and group file:
mkgroup >
mkpasswd -cl > /etc/passwd
Next, set proper permissions on passwd and group files with the following command:
export CYGWIN='ntsec tty'
chmod +rw /etc/group
chmod +rw /etc/passwd
chmod 0755 /var
Next, you will need to configure the Cygwin SSH daemon to access the Windows system through SSH protocol. You can run the following command in the Cygwin terminal to configure SSH:
ssh-host-config
You should see the following output:
*** Info: Generating missing SSH host keys
ssh-keygen: generating new host keys: RSA DSA ECDSA ED25519
*** Info: Creating default /etc/ssh_config file
*** Info: Creating default /etc/sshd_config file

*** Info: StrictModes is set to 'yes' by default.
*** Info: This is the recommended setting, but it requires that the POSIX
*** Info: permissions of the user's home directory, the user's .ssh
*** Info: directory and the user's ssh key files are tight so that
*** Info: only the user has write permissions.
*** Info: On the other hand, StrictModes don't work well with the default
*** Info: Windows permissions of a home directory mounted with the
*** Info: 'noacl' option and they don't work at all if the home
*** Info: directory is on a FAT or FAT32 partition.
*** Query: Should StrictModes be used? (yes/no) yes
*** Info: Updating /etc/sshd_config file

*** Query: Do you want to install sshd as a service?
*** Query: (Say "no" if it is already installed as a service) (yes/no) yes
*** Query: Enter the value of CYGWIN for the daemon: []

*** Info: The sshd service has been installed under the LocalSystem
*** Info: account (also known as SYSTEM). To start the service now, call
*** Info: `net start cygsshd' or `cygrunsrv -S cygsshd'. Otherwise, it
*** Info: will start automatically after the next reboot.

*** Info: Host configuration finished. Have fun!
Next, you will need to start the SSH daemon. You can start it with the following command:
net start cygsshd
You will get the following output:
The CYGWIN cyg sshd service is starting.
The CYGWIN cyg sshd service was started successfully.
Create SFTP User
Next, you will need to create an SFTP user and directory on your server.
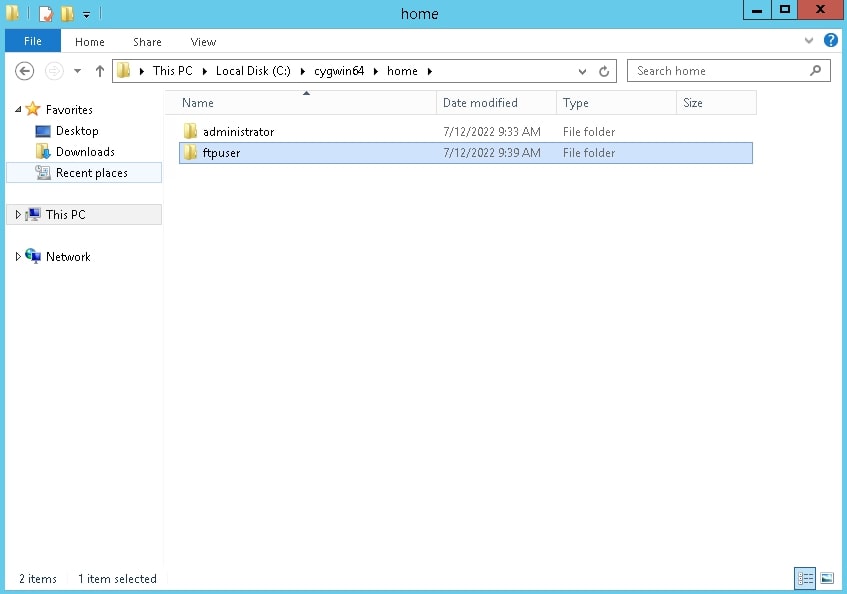
First, go to the C: Drive => cygwin64 => home and create a directory named ftpuser:
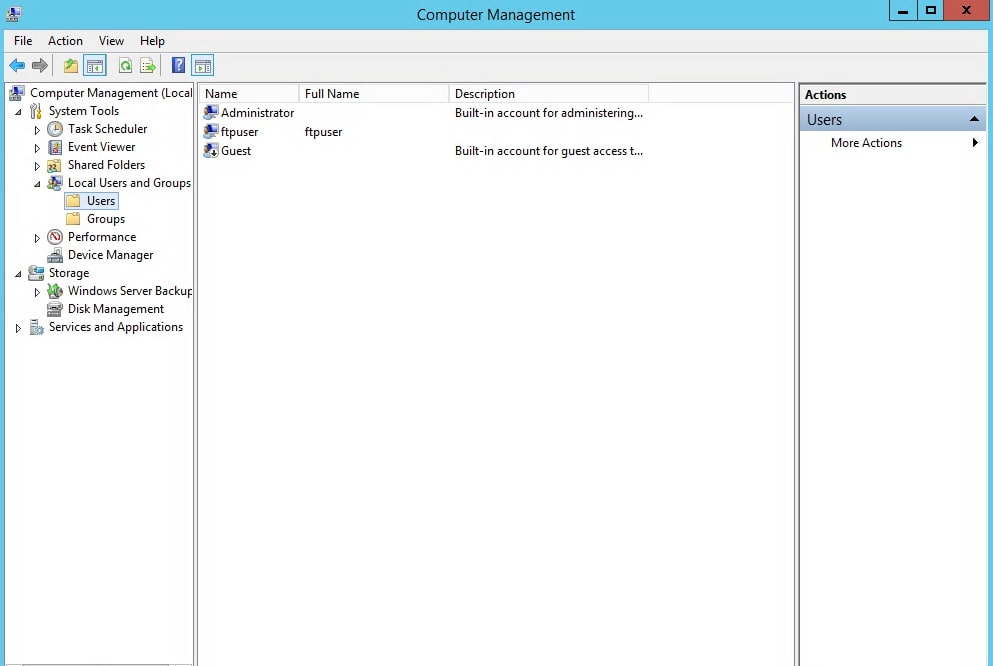
Next, open the Control Panel => Administrative Tools => Computer management => Local User and groups then create a new user named ftpuser as shown below:
Next, you will need to add the newly created user details to Cygwin’s passwd file. You can add it with the following command:
mkpasswd -cl > /etc/passwd
Next, set proper ownership to /home/ftpuser directory:
chown -R ftpuser /home/ftpuser
Verify Local SFTP Connection
At this point, the SFTP server is installed and configured. Let’s test it from the local PC.
Open your Cygwin terminal and run the following command to test the SFTP connection:
sftp.exe ftpuser@localhost
You will be asked to provide your FTP user’s password to connect to the SFTP server:
The authenticity of host 'localhost (::1)' can't be established.
ED25519 key fingerprint is SHA256:lG19wWcRw42c4Ks+pc6zCk2xDkp89RZVsTGOowbVUvs.
This key is not known by any other names
Are you sure you want to continue connecting (yes/no/[fingerprint])? yes
Warning: Permanently added 'localhost' (ED25519) to the list of known hosts.
ftpuser@localhost's password:
Provide your password then press the Enter key. Once you are connected to the SFTP server. You will get the following shell:
Connected to localhost.
sftp>
Connect SFTP from Linux
In this section, we will show you how to connect an SFTP server via the command line and graphical interface.
Connect SFTP Server Via Command Line
Open your terminal and run the following command to connect to the SFTP server:
sftp ftpuser@208.117.87.124
You will be asked to provide your password as shown below:
The authenticity of host '208.117.87.124 (208.117.87.124)' can't be established.
The ECDSA key fingerprint is SHA256:3/0F+Js1+iH51EHcs27Jz0CRjpYNIZhp8nqtlXUwDXc.
Are you sure you want to continue connecting (yes/no)? yes
Warning: Permanently added '208.117.87.124' (ECDSA) to the list of known hosts.
ftpuser@208.117.87.124's password:
Provide your password and press the Enter key. Once you are connected, you should get the SFTP shell:
sftp>
Now, create some files and a directory on the SFTP server:
mkdir test
touch file1.txt file2.txt
Connect SFTP Server Using File Manager
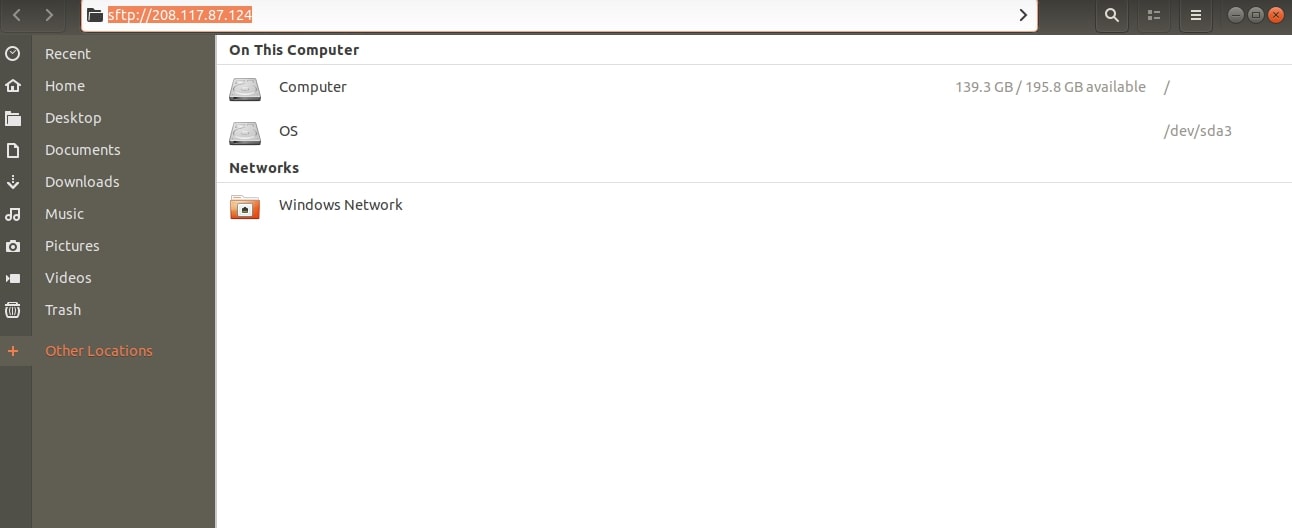
Open your Linux File Manager and press the CTRL+L key. You should see the following screen:
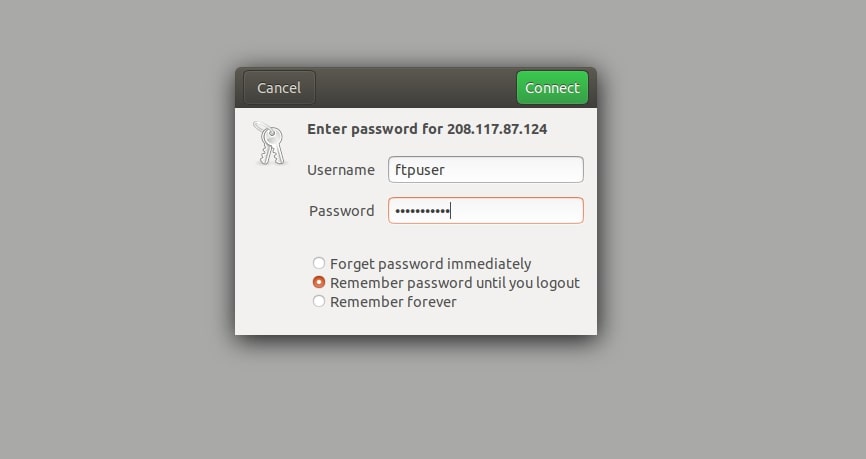
Type your SFTP server URL and press the Enter key. You will be asked to provide a username and password:
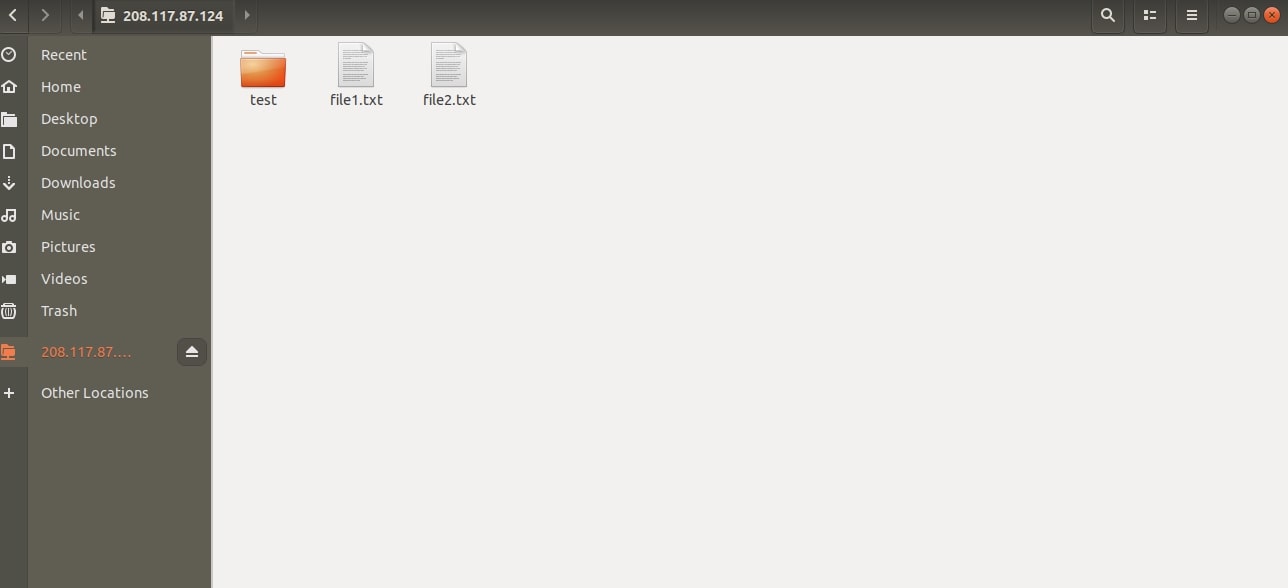
Provide your username, and password, and click on the Connect button. Once you are connected, you should see the SFTP server on the following screen:
Connect SFTP from Windows
To connect an SFTP server from the Windows machine, you will need to install SFTP client software on your Windows machine. Here, we will use the FileZilla client to connect to the SFTP server.
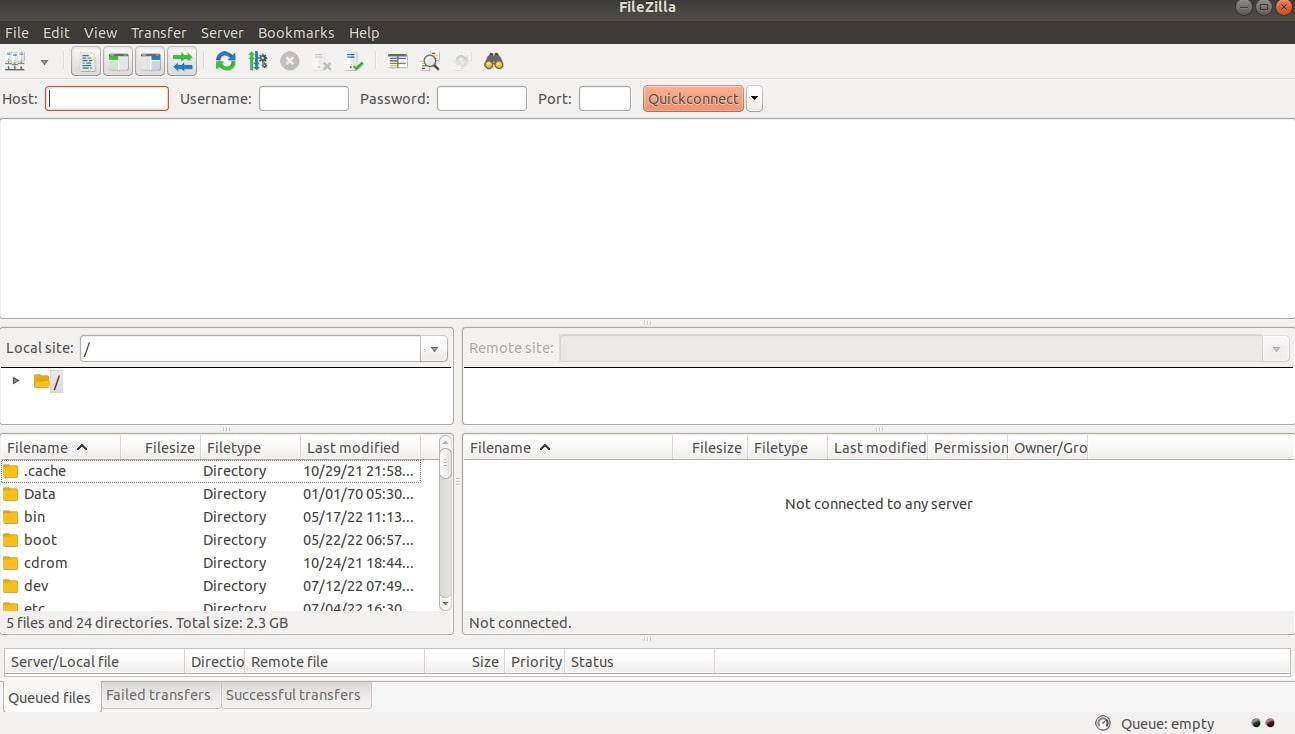
First, open the FileZilla client. You should see the following screen:
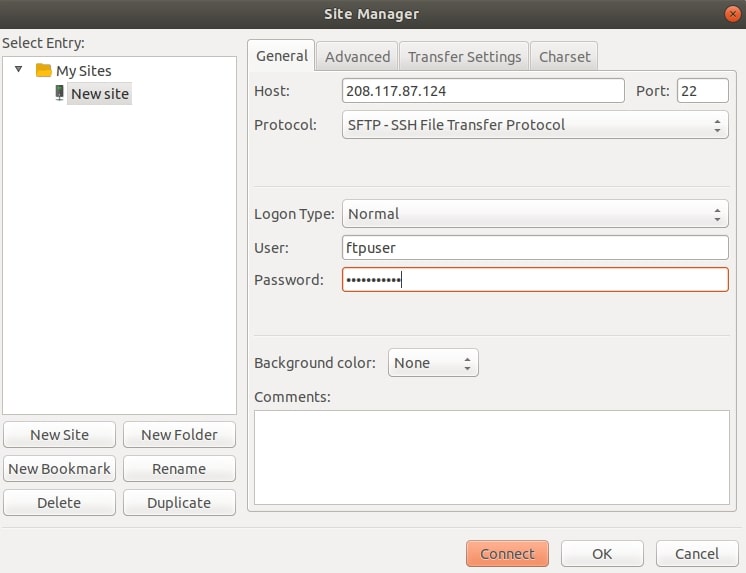
Click on the Site Manager to create a new SFTP connection as shown below:
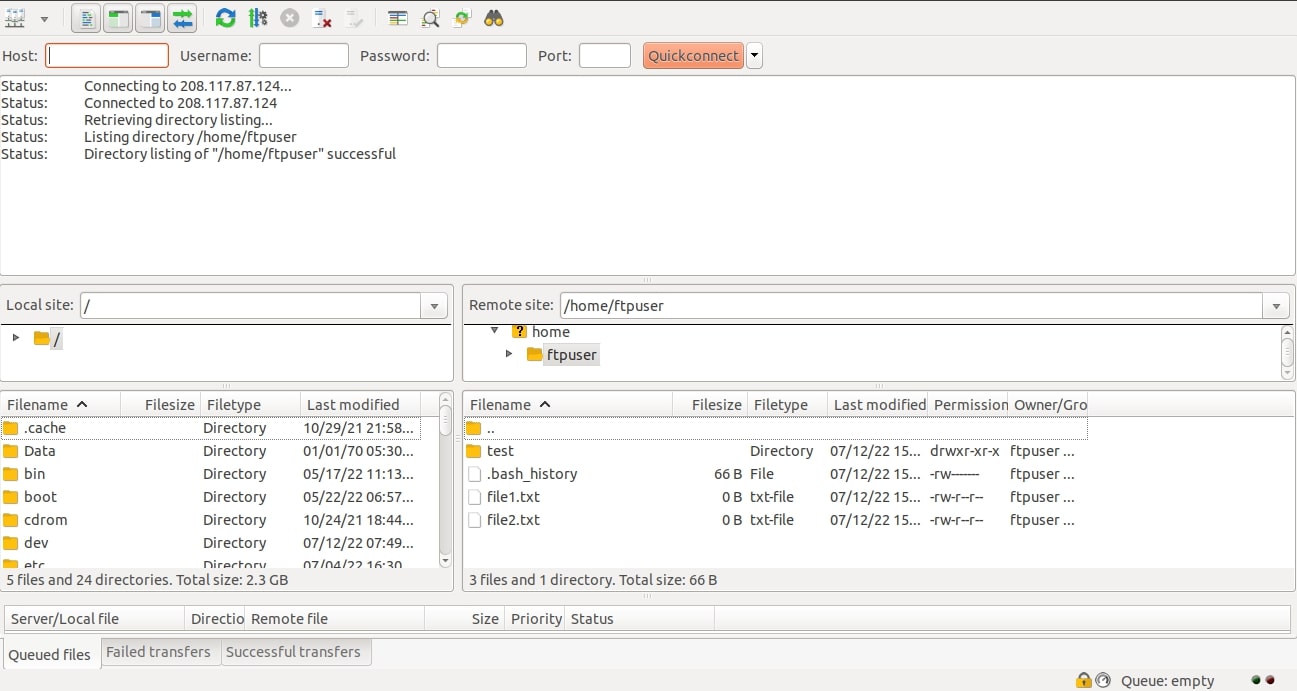
Provide your SFTP server IP, username, password, and port, and click on the Connect button. Once you are connected to the SFTP server. You should see your SFTP server home directory on the following screen:
Recommended SFTP Tools
SolarWinds SFTP (FREE TOOL)
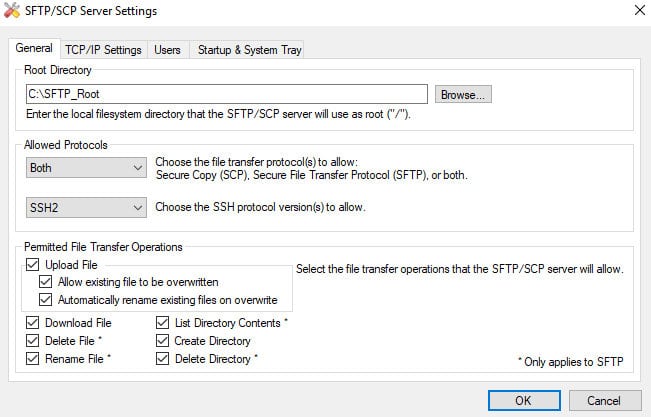
SolarWinds SFTP server is a free and reliable file transfer system best suited for network administrators. Any company that wants to transfer files securely over the Internet, perform system updates, or create configuration backups across cloud resources must invest in the SFTP Server from SolarWinds.
Key Features:
- It has a simple user interface that helps reduce the number of resources needed by the program and prevents it from hogging the network and disk space.
- Allows file transfer up to 4GB in size.
- It helps securely transfer configuration files on a network.
- Supports SSH1 and SSH2 versions for secure file transfers.
- Allows administrators to limit user actions to prevent damage that might take place due to less experienced or new team members.
- Supports user authentication.
- Grants authority to specific or a range of IPs.
- Supports secure file transfers from multiple devices simultaneously.
It is a trusted, free-to-use Secure File Transfer Protocol that provides high-level security via SSH keys and encryption methods.
SolarWinds SFTP server involves the use of TCP and default port 22 to manage connections. Also, it allows administrators to transfer files of up to 4GB and is compatible with the latest 64-bit operating systems.
If you want to push OS images, firmware and configuration updates, or backup configuration files in a secure manner, we recommend the SolarWinds SFTP server. It comprises various features that make it a top choice.
Website Link: https://solarwinds.com/free-tools/free-sftp-server
Download: Click here to download SolarWinds SFTP
Files.com SFTP Server
When exchanging data with external parties, every organization looks forward to investing in a platform that provides secure file transfers.
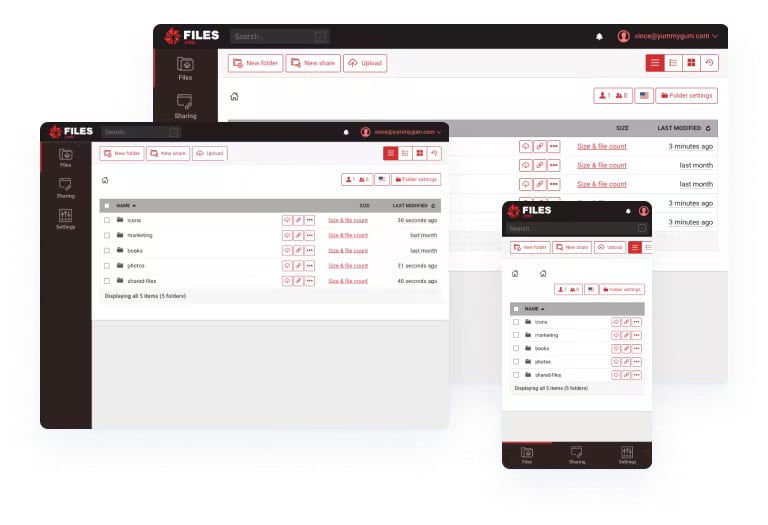
Files.com is one of the largest commercial FTP and SFTP server hosting providers in the world. A few companies call it a dead technology, but it continues to offer FTP support. If you are looking for a file transfer solution that offers seamless transfers and better data security, then Files.com is the right platform for you.
Key Features:
- Secures file exchange by enforcing only trusted and proven encryption ciphers.
- Supports all FTPS, FTPeS, insecure FTP, and active and passive mode FTP connections.
- Protects data from outsiders using SSH keys or public-key authentication.
- Offers fine-grained permission controls.
- Supports webhooks.
- Automation workflows.
- Users find it quick to upload and download files.
- Allows storing files in multiple geographic endpoints.
- Offers Universal Client Support.
- Supports API and SDKs.
- No Code Automations supported.
- Users can access files from any location via this platform.
- Email notifications or instant alerts.
- Allows users to securely send, share and receive files.
- Allows integration with other providers, including Dropbox, Box, and Amazon S3.
- Users can mount an external SFTP site into the account as a folder.
- Supports inbound SFTP connections
Files.com supports both supports FTP and SFTP processes and is primarily written in Java language.
Further, the Files.com SFTP Server helps send, share and receive files securely from different sources. It enforces only trusted and proven encryption ciphers that help maintain better data security.
Website Link: https://files.com/features/ftp-sftp-support
Conclusion
In this post, we explained how to install an SFTP server with Cygwin on Windows. We also verify the SFTP connection from the Linux machine as well as the Windows machine. I hope you can now set up your own SFTP server in your organization to transfer files quickly and easily from a remote location.


