SFTP is a secure file transfer protocol that can be used to transfer files securely over the network. It uses Secure Shell (SSH) protocol to access, transfer and manage files between two hosts. Azure allows you to set up a VM-based SFTP server on their blob storage. But, it is very expensive compared to other SFTP services. In this case, you can set up an SFTP server using Azure blob storage and integrate it with the Files.com file sharing service to reduce your management costs.
In this guide, we will show you how to set up a VM-based SFTP server on Microsoft Azure and then integrate it with Files.com.
Set Up a Secure SFTP Server on Microsoft Azure
In this section, we will create blob storage on Microsoft Azure and then create an Azure Container Instance to deploy an SFTP server.
Create a Blob Storage
Microsoft Azure allows you to create a storage space that is accessible from anywhere over the HTTP and HTTPS protocols. Follow the steps below to create blob storage on Microsoft Azure:
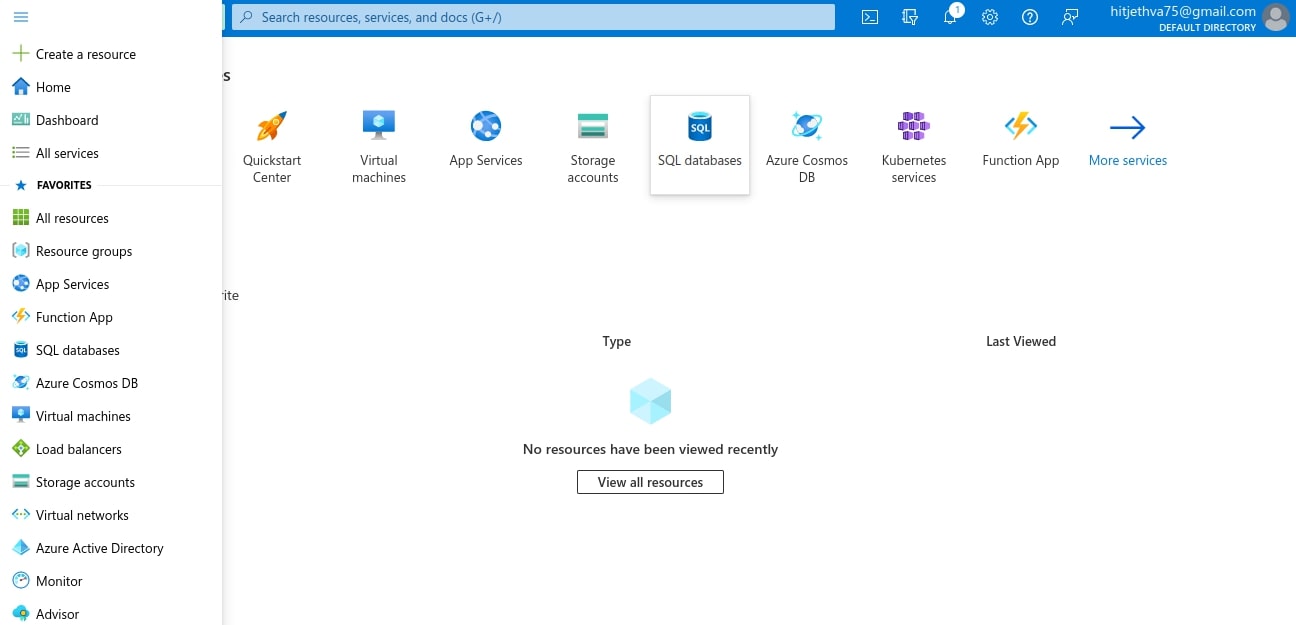
Step 1 – First, sign in to Microsoft Azure at https://portal.azure.com/ as shown below:
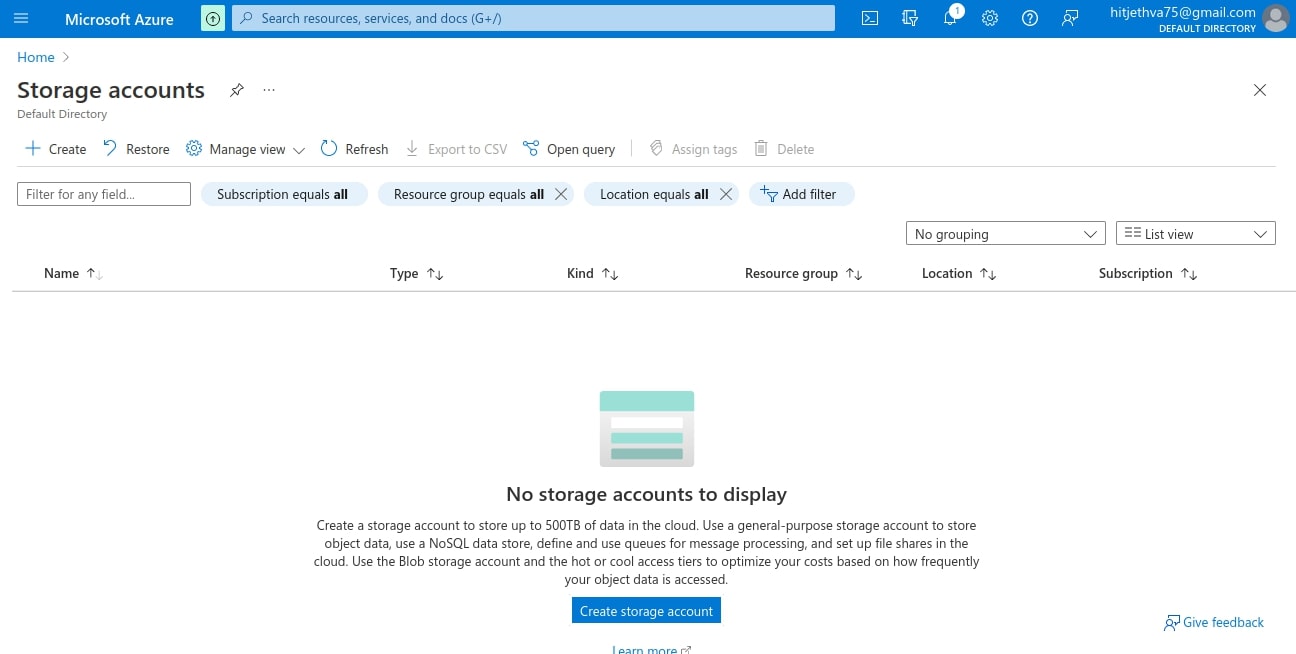
Step 2 – Click on the Storage account in the left pane. You should see the storage account screen:
Step 3 – Click on the Create button on the top left pane. You should see the storage account creation screen:
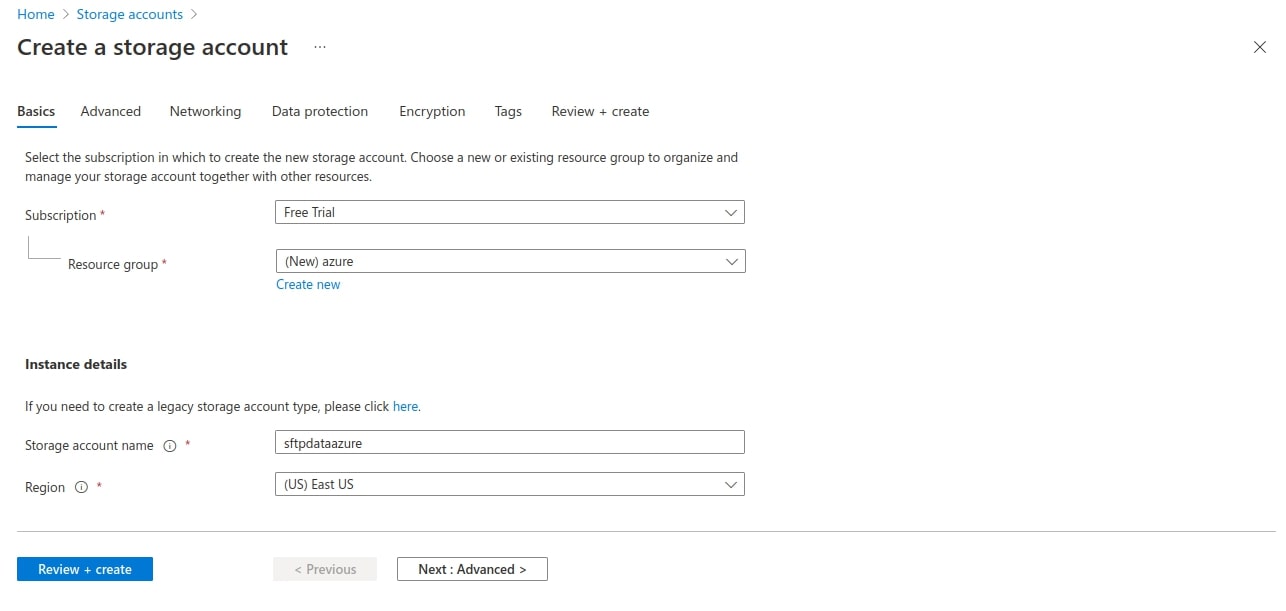
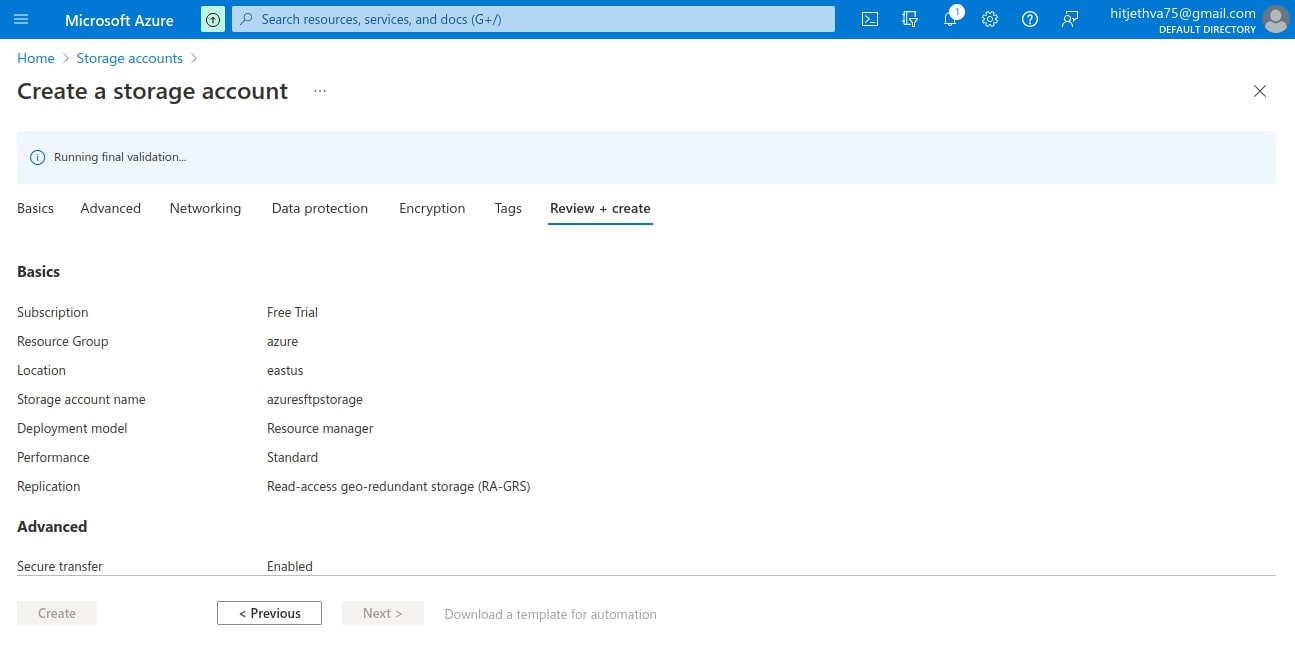
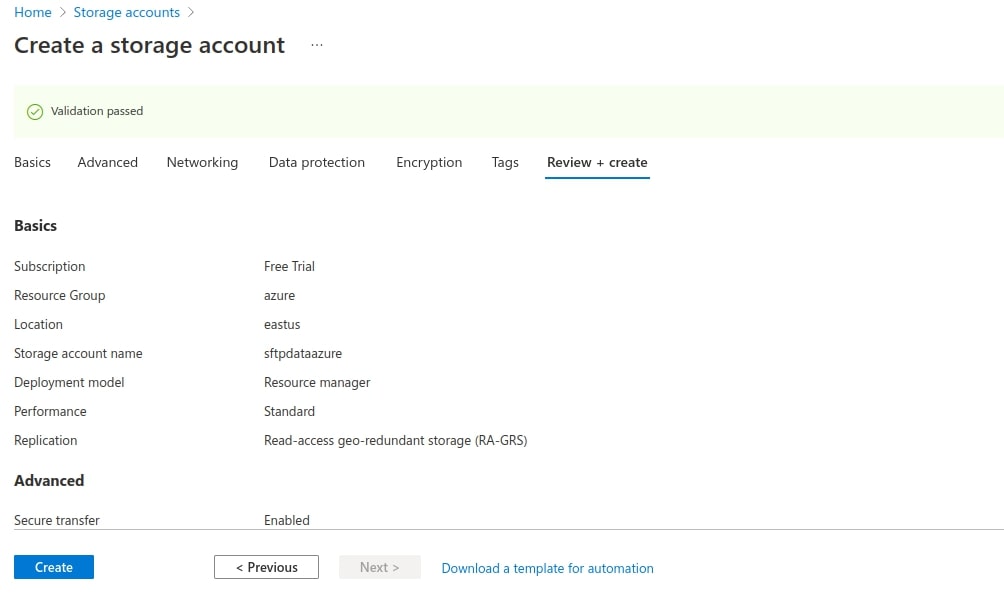
Step 4 – Provide your resource group name, storage account name, and click on the Review + create button. You should see the review configuration screen:
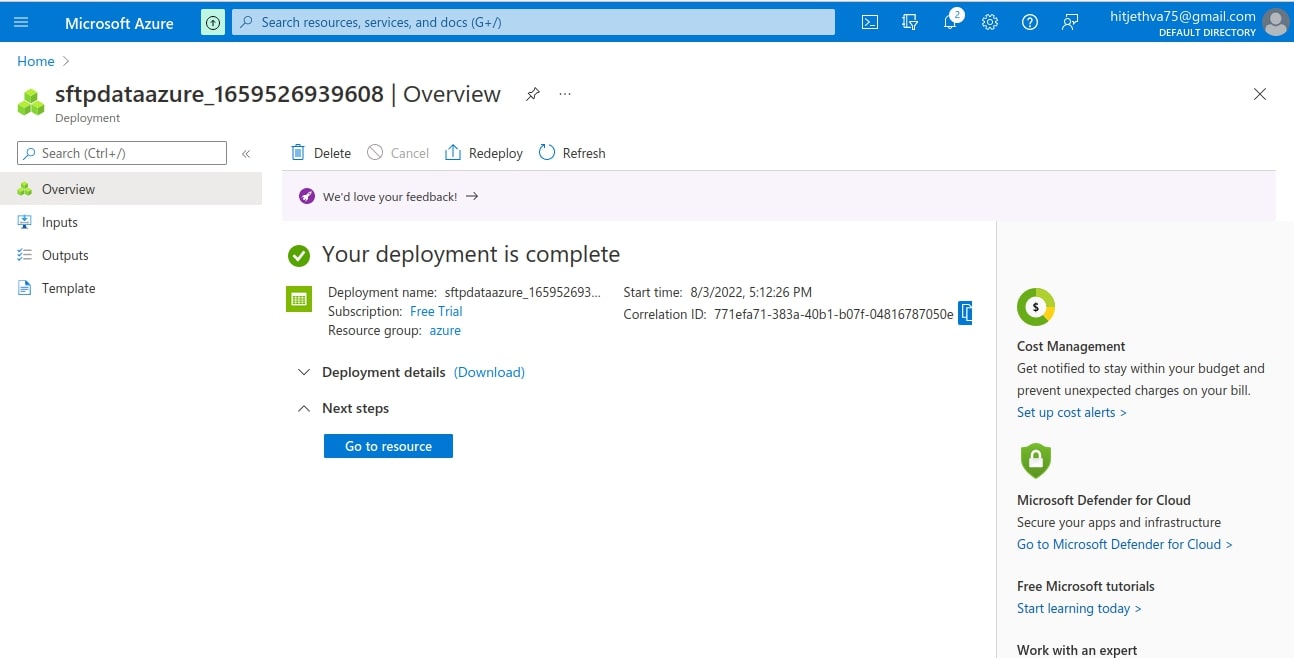
Step 5 – Review all configurations and click on the Create button. Once the storage account is created, you should see the following screen:
Create an ACI Container
In this section, we will create a container on the Azure portal to deploy the SFTP server. Follow the steps below to create a container.
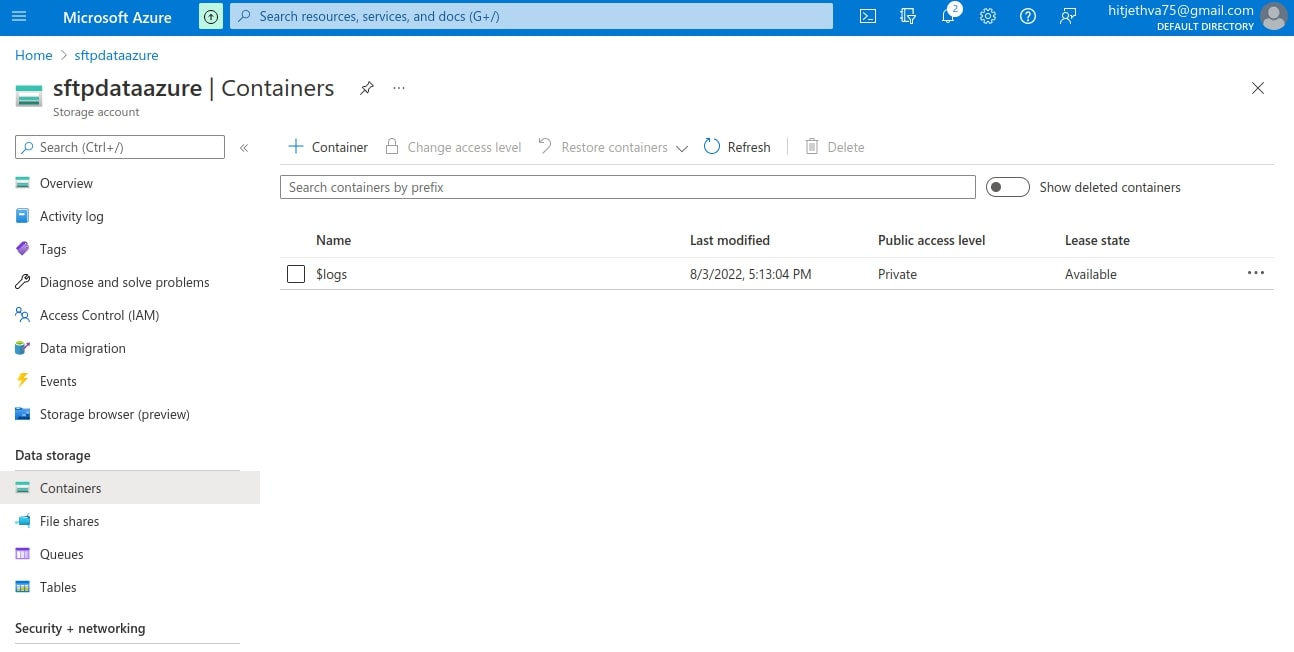
Step 1 – Sign in to the Azure portal and go to your storage account. You should see the following screen:
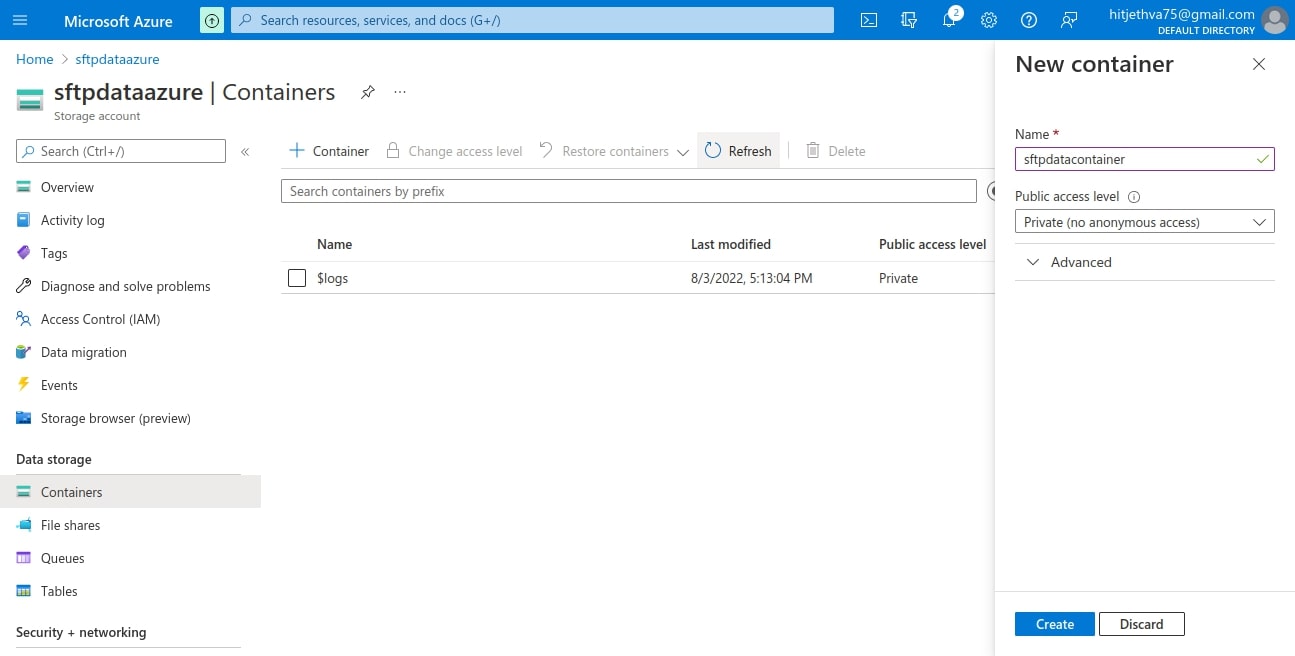
Step 2 – Click on the Data storage => Containers and click on the +Container button. You will be asked to provide your container name and access level:
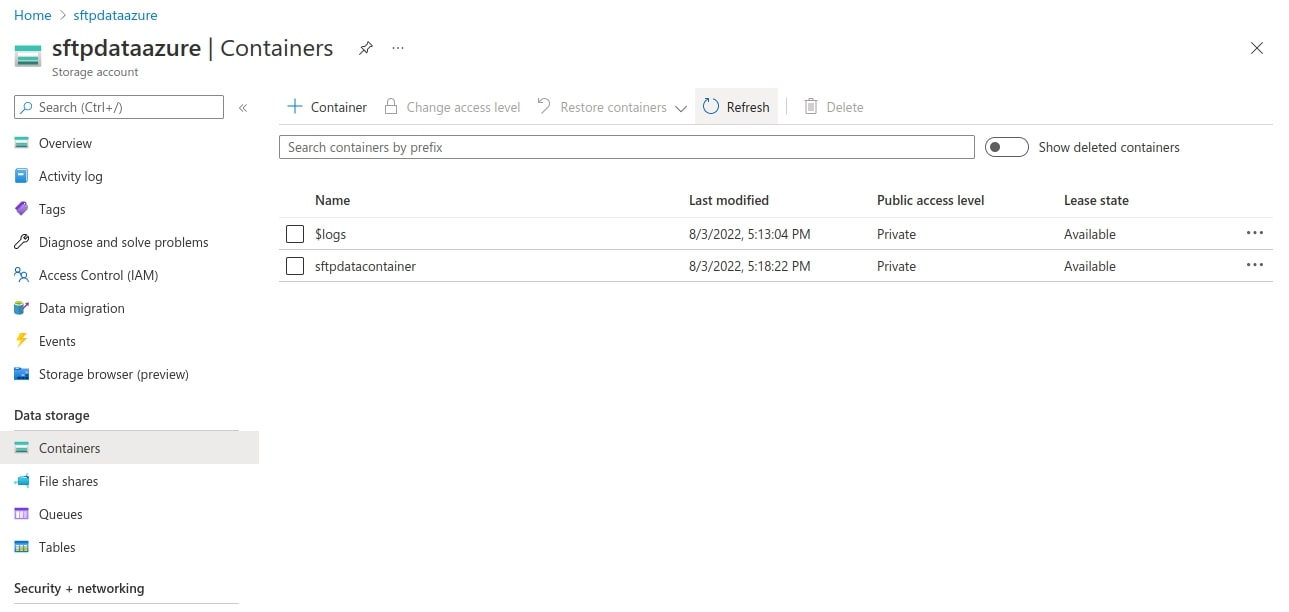
Step 3 – Type your container name, access level and click on the Create button to create a new ACI container. Once the container has been created, you should see the following screen:
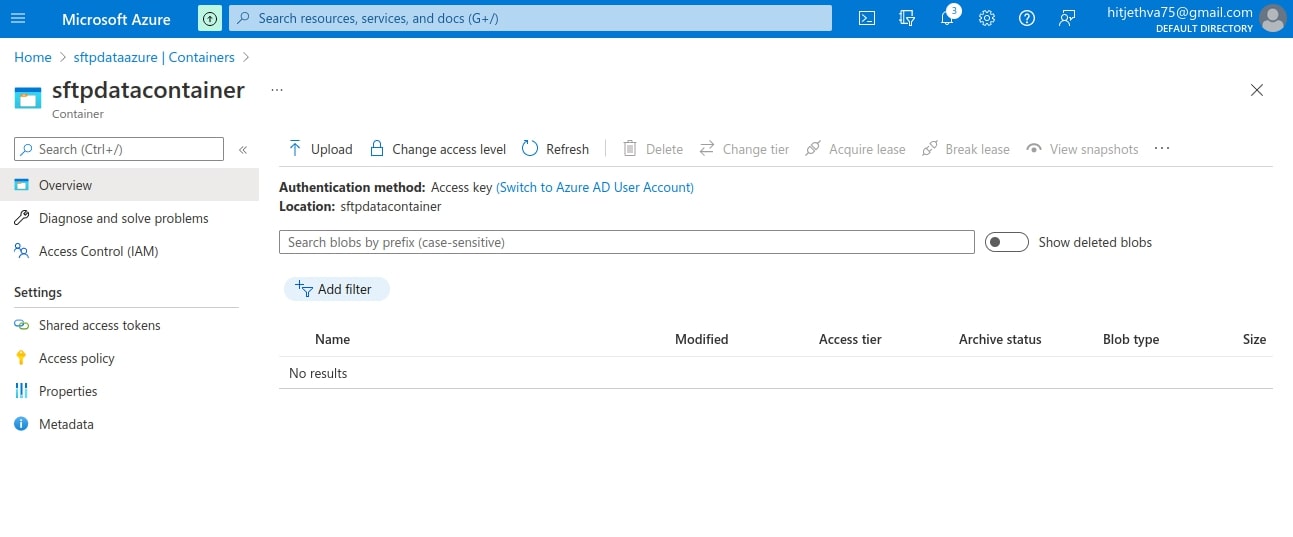
Step 4 – Now, go inside your created container as shown below:
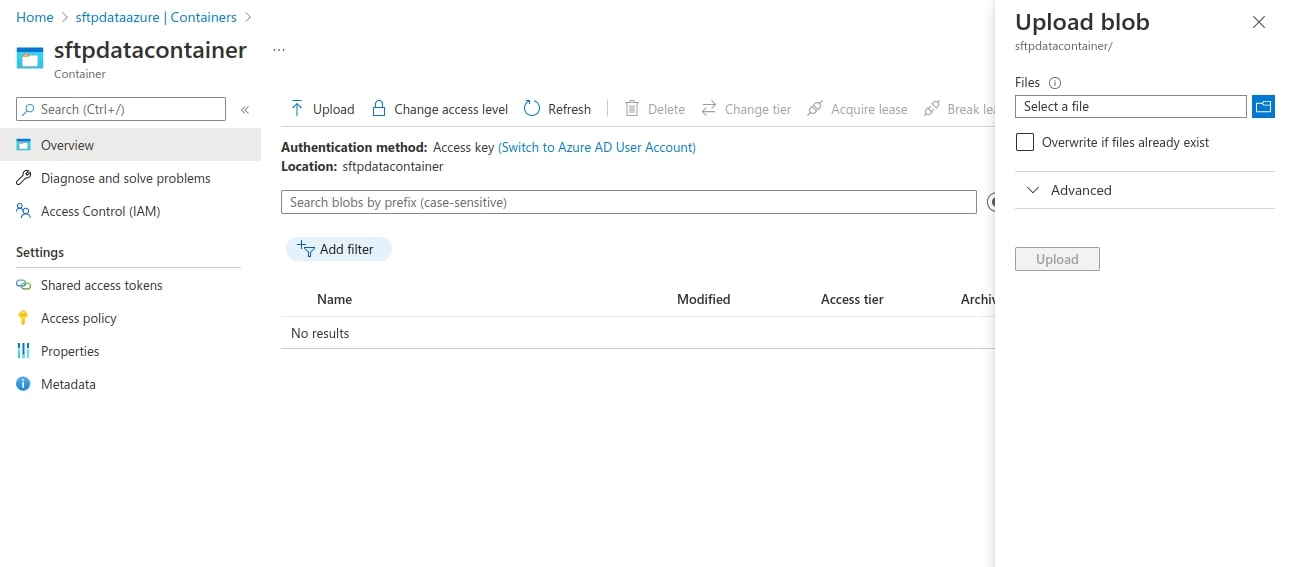
Step 5 – Click on the Upload button to upload some files from your local system to the container instance. You should see the following screen:
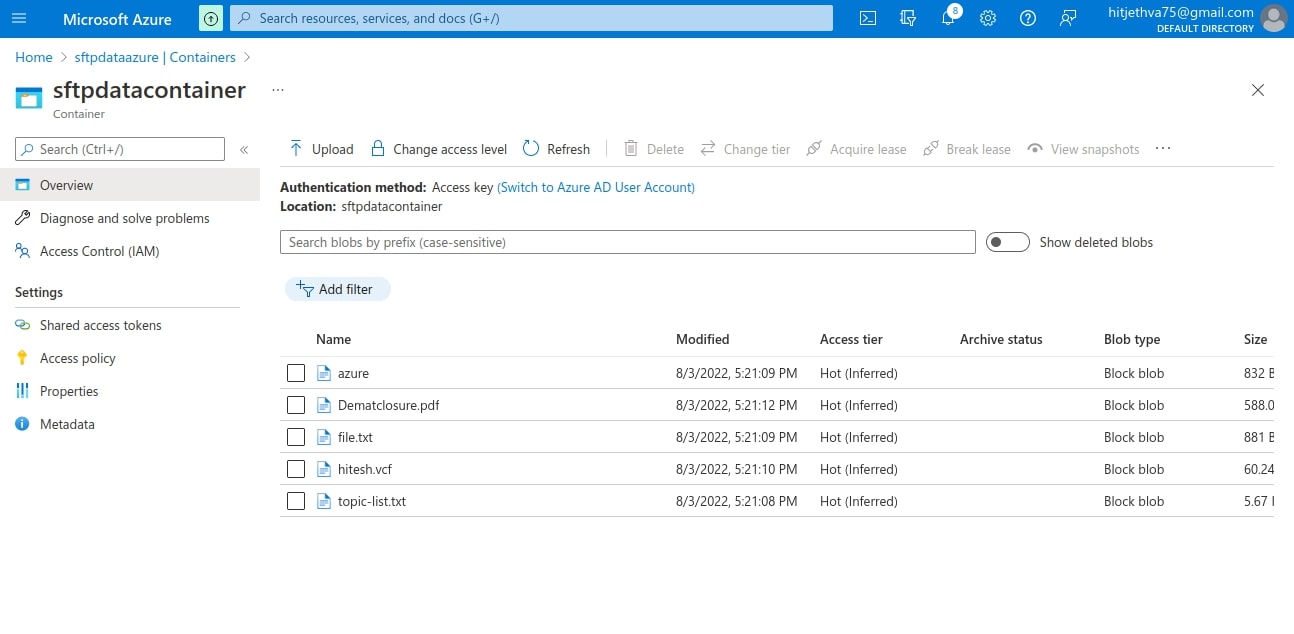
Step 6 – Select your files from the local system and click on the Upload button. You should see your uploaded files on the following screen:
Integrate Azure SFTP with File.com File Sharing Service
Files.com is a file-sharing solution that allows you to mount and sync all files from the Azure blob storage to Files.com.
Introduce Files.com and its Advantages
Files.com is a SaaS MFT file transfer solution that allows organizations to transfer or share files between users, teams, and organizations (B2B) securely. This unique solution works at connecting the elementary benefits of FTP software with the security and automation of Managed File Transfer (MFT) software.
This leading file integration and automation platform is designed to provide both mid-market and enterprise organizations with traditional file transfer features that are combined with enterprise-focused scalability and efficiency. It is performed along with scalable, file-centric integrations and automation, industry-standard security, and compliance considerations. It also focuses on elevating collaboration and user adoption all over the organization.
Moreover, FIles.com leverages pre-existing applications and workflows within the software toolchain. Apart from delivering exceptional security and compliance support, it provides multiple 2FA, MFA, and SSO integration options that prove to be highly beneficial for IT teams as they can ensure security across the enterprise. Those who require regulatory compliance mandates can acquire detailed audit logs, granular permission control, and data encryption effortlessly.
Files.com knows the importance file transfer holds in today’s digital workplace and hence allows you to acquire real-time file access to further collaboration efforts both internally and externally.
The features provided by Files.com are:
- Secure File Sharing Application All file transfers in Files.com are protected with SSH (SFTP) and TLS (FTPS). It even allows you to create HTTPS links to folders for secure access.
- Encrypted Data Storage All the files’ security is encrypted for added security.
- Two-factor Authentication All the accounts within this platform are protected by two-factor authentication and can host several user identities.
- Collaboration Software Integrations You can integrate several collaboration systems into the Files.com account. One example of such integration is the Microsoft 365 online productivity suite that can be accessed directly in the Files.com account.
Advantages Of Files.com
File.com allows you to leverage the following benefits:
- Since it is a cloud-based application, onboarding becomes faster and more streamlined than other on-premises tools.
- It allows you to customize your files and folder security even though it has by default a secured protocol.
- It has flexible pricing, making it a perfect fit for all sizes of organizations.
- It provides a seven-day free trial to its users.
- It supports a single interface to manage multiple cloud storage solutions, which are considered best for businesses having their files spread across several channels.
- It enables HIPAA/PCI compliant file storage giving more flexibility with their data.
Mount Azure Blob Storage on Files.com
Follow the steps below to mount Azure blob storage on Files.com.
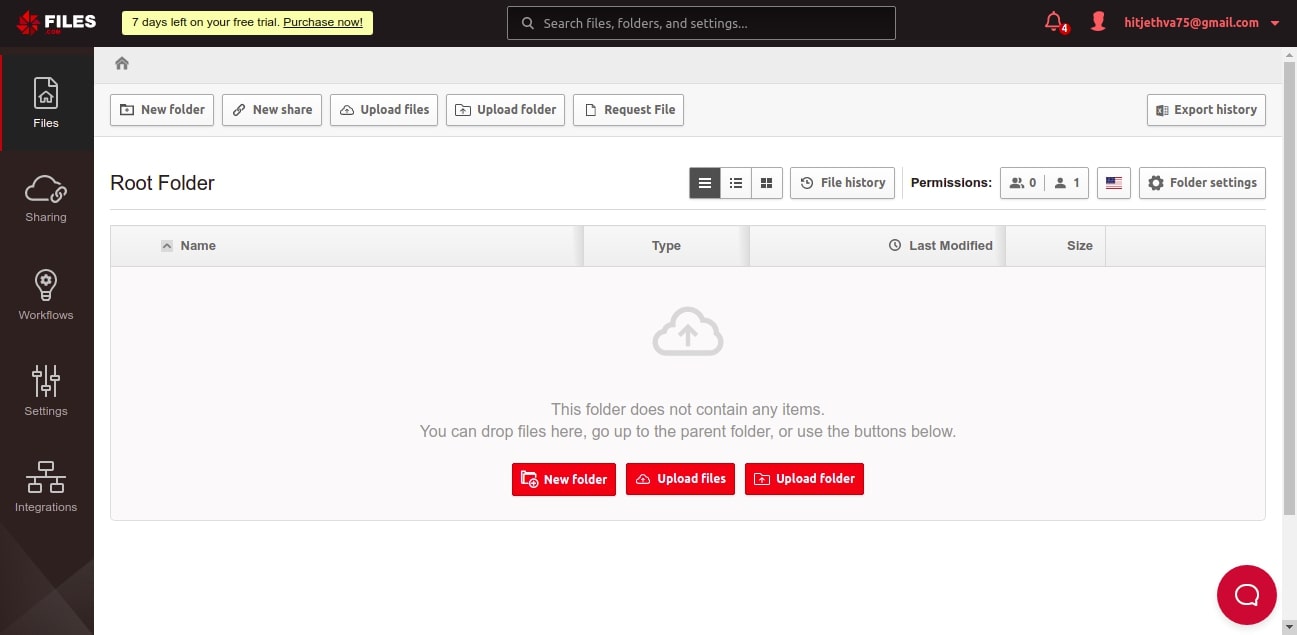
Step 1 – First, sign up for a 7-day free trial on Files.com. You should see the following screen:
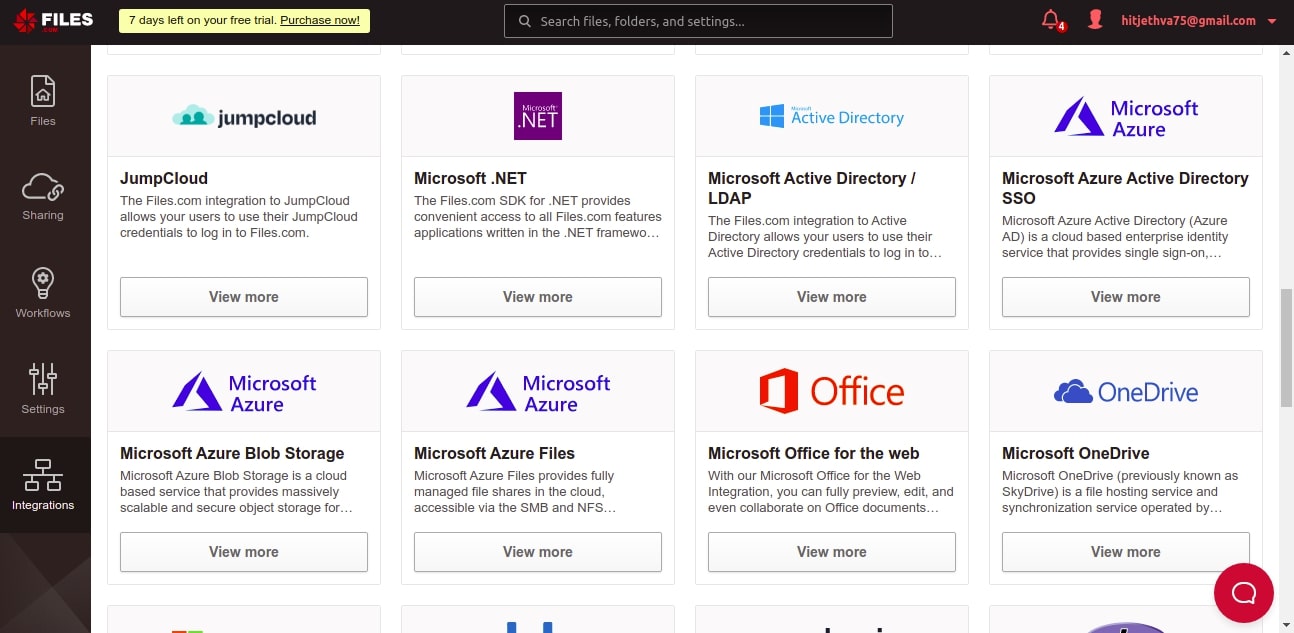
Step 2 – Click on the Integration to get a list of all supported services as shown below:
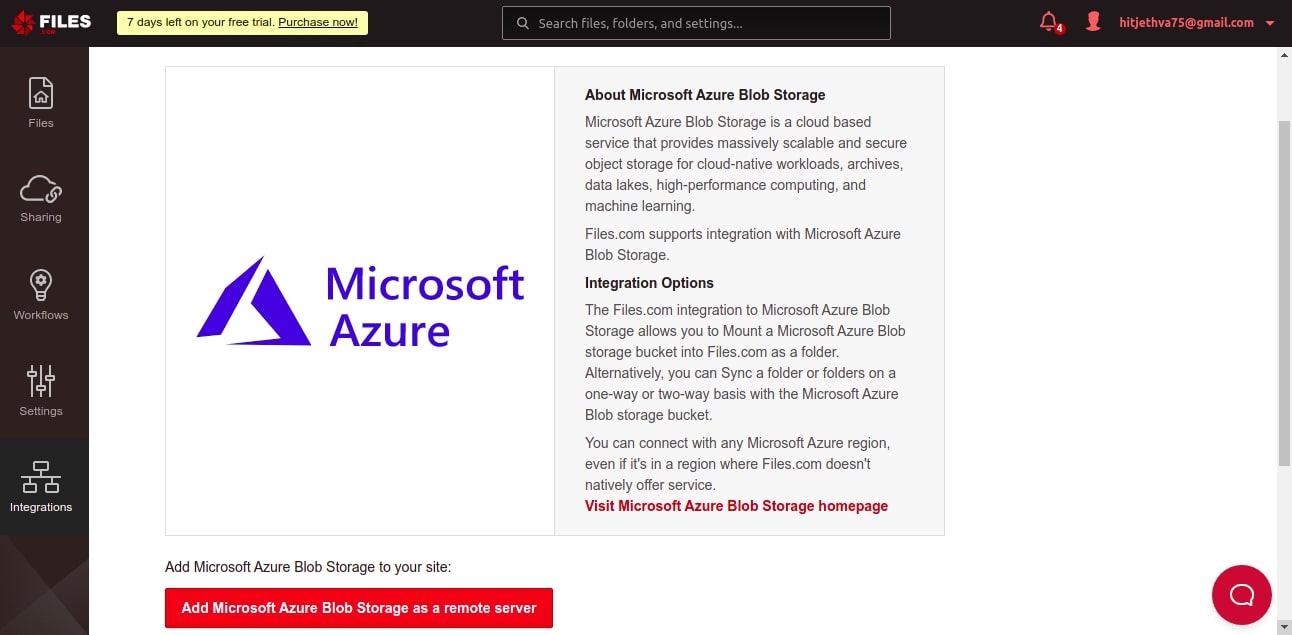
Step 3 – Click on Microsoft Azure. You should see the following screen:
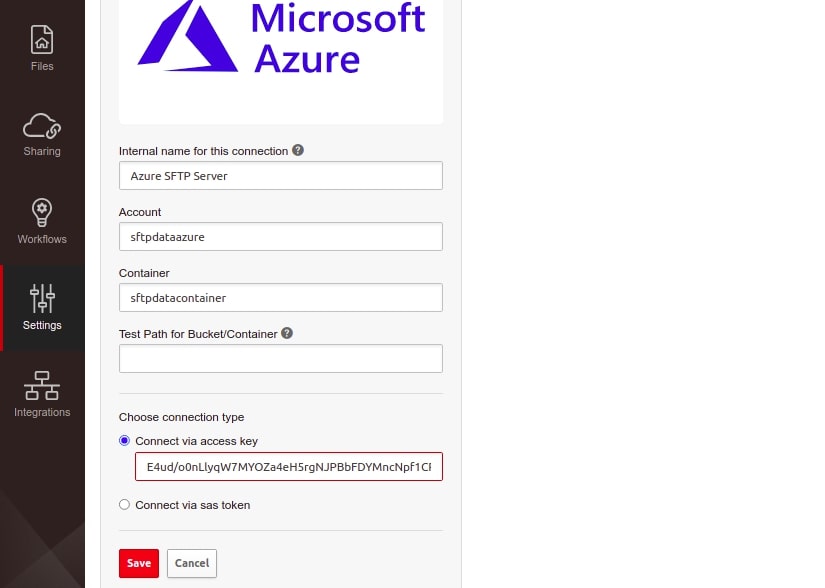
Step 4 – Click Add Microsoft Azure as a remote server. You will be asked to provide your Azure storage information and access key:
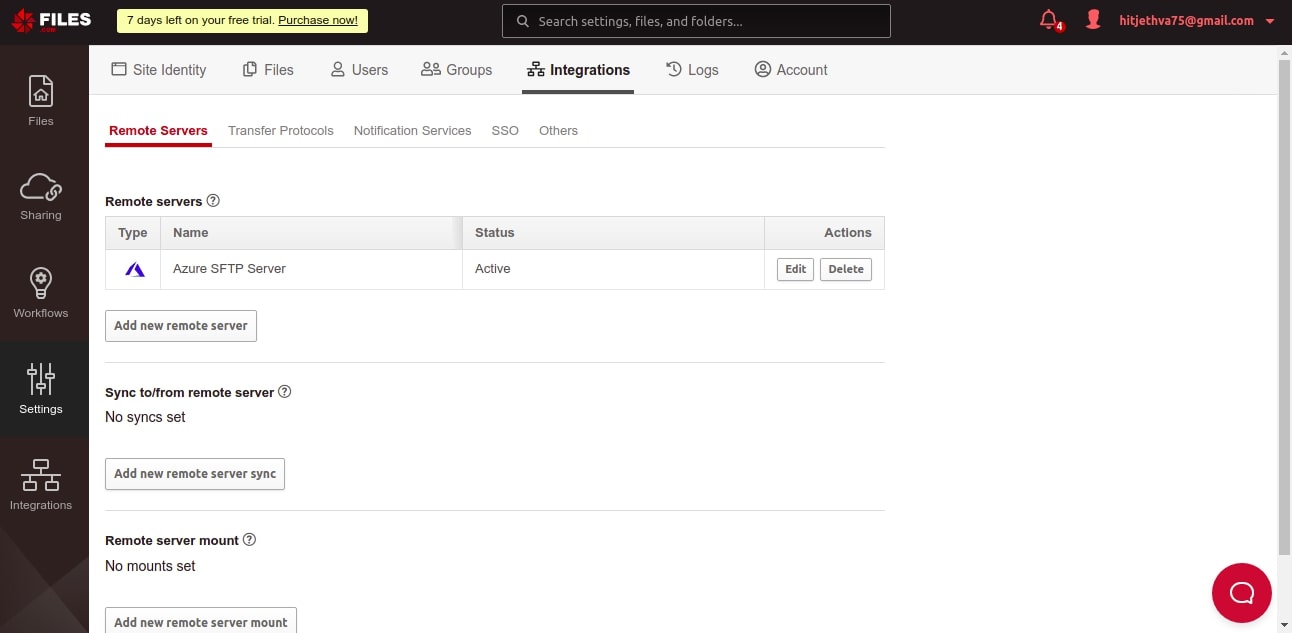
Step 5 – Provide connection name, Azure storage account name, container name, access key, and click on the Save button. Once you are connected to Azure. You should see the following screen:
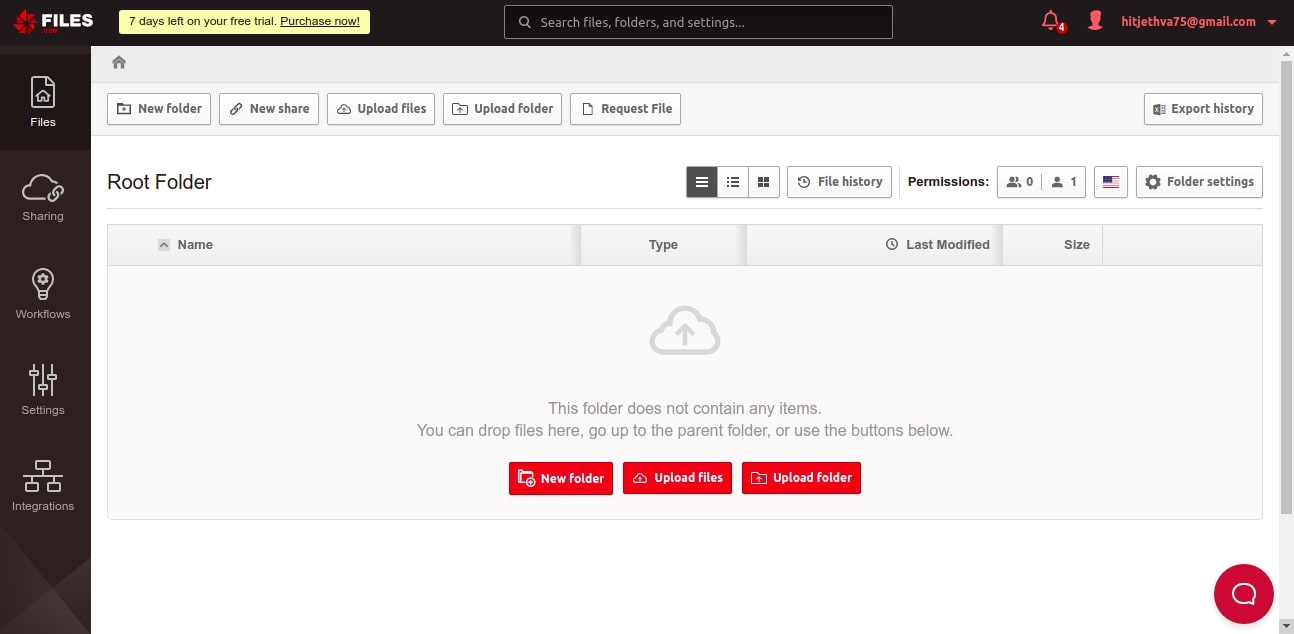
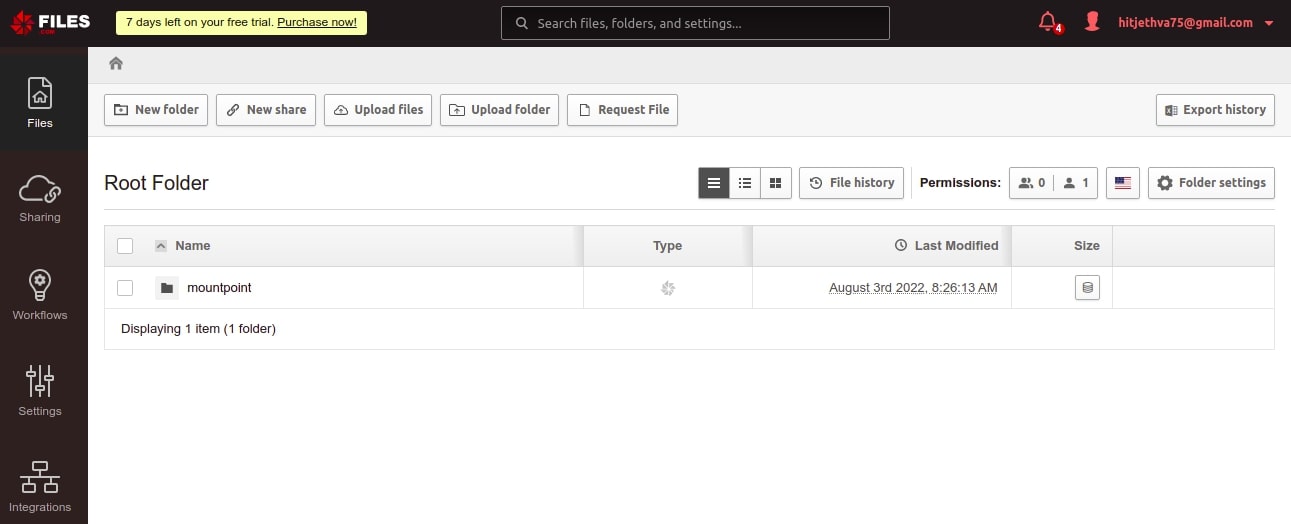
Step 6 – Click on the Files on the dashboard. You should see the following screen:
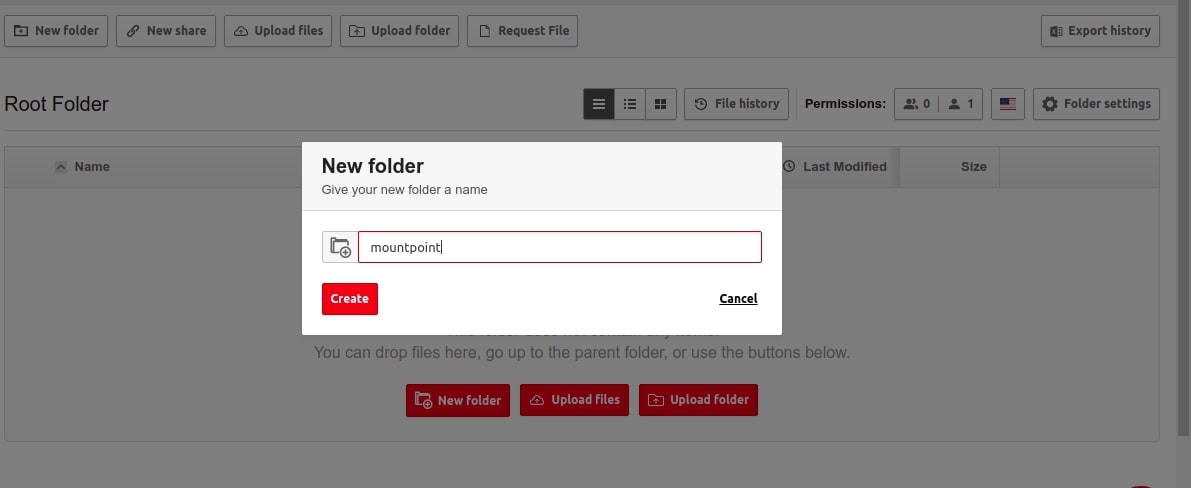
Step 7 – Click on the New Folder. You should see the folder creation screen:
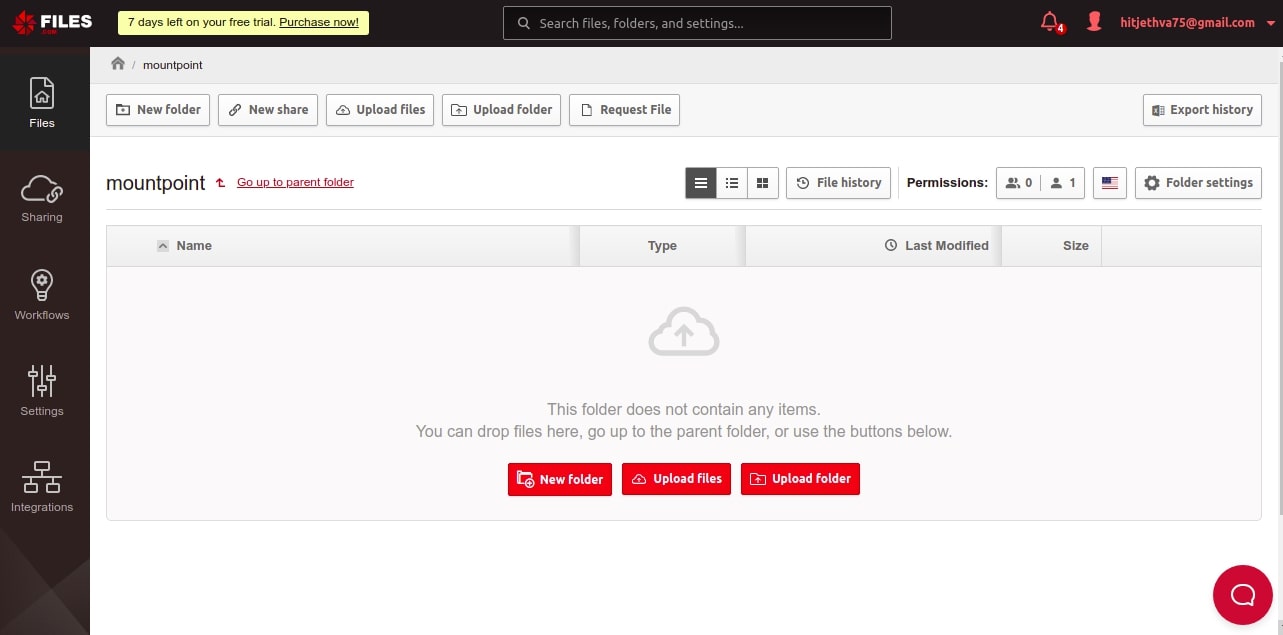
Step 8 – Provide your folder name and click on the Create button to create a folder.
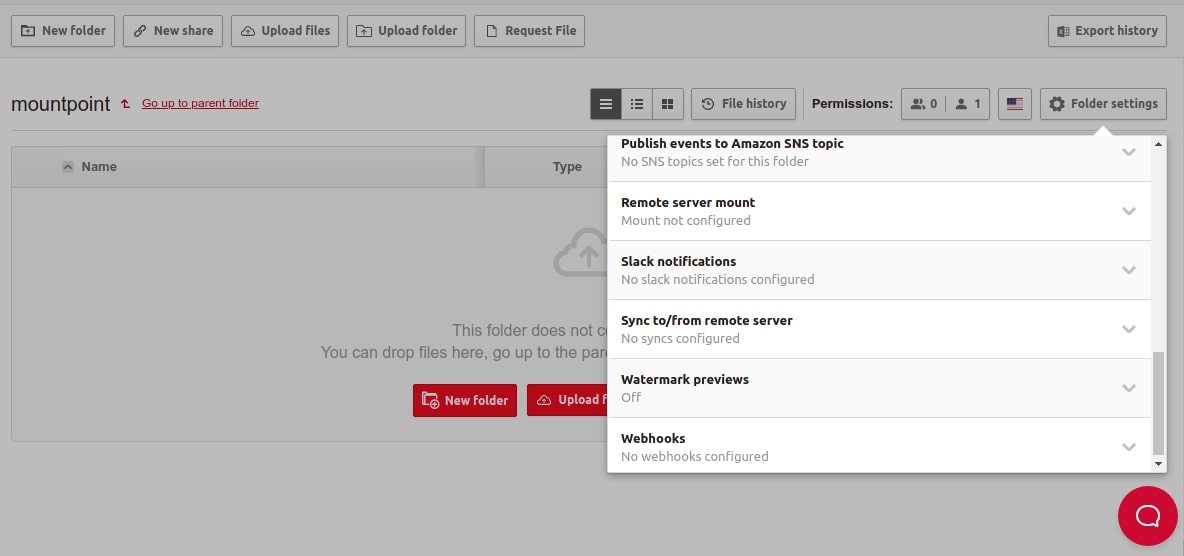
Step 9 – Now, go inside the created folder and click on the Folder settings. You should see the following screen:
Step 10 – Click on Remote server mount to mount Azure storage. You should see different mount options on the following screen:
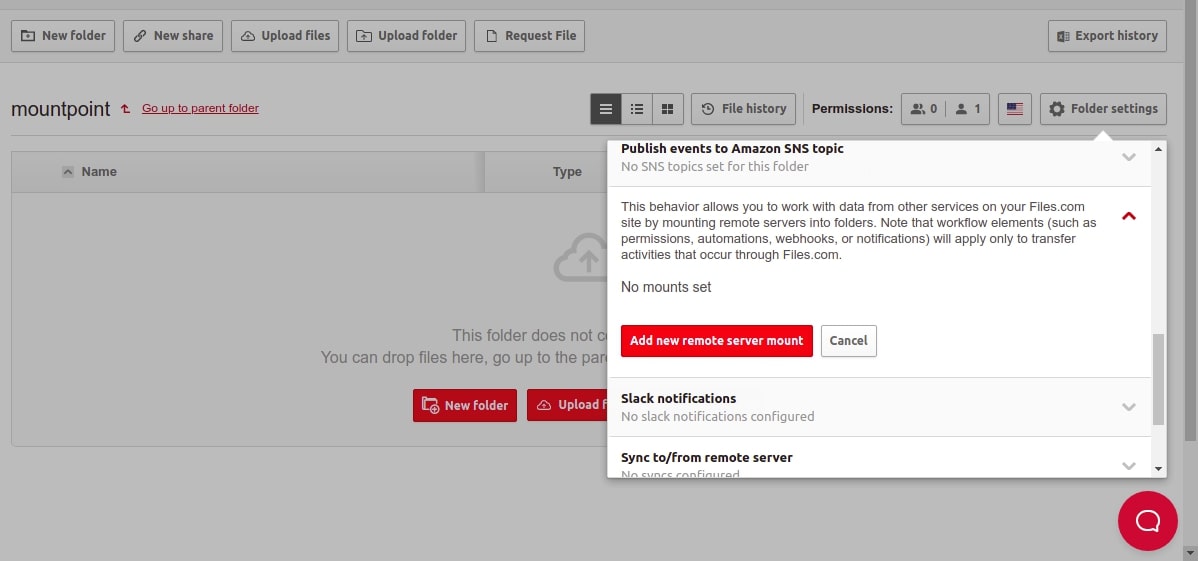
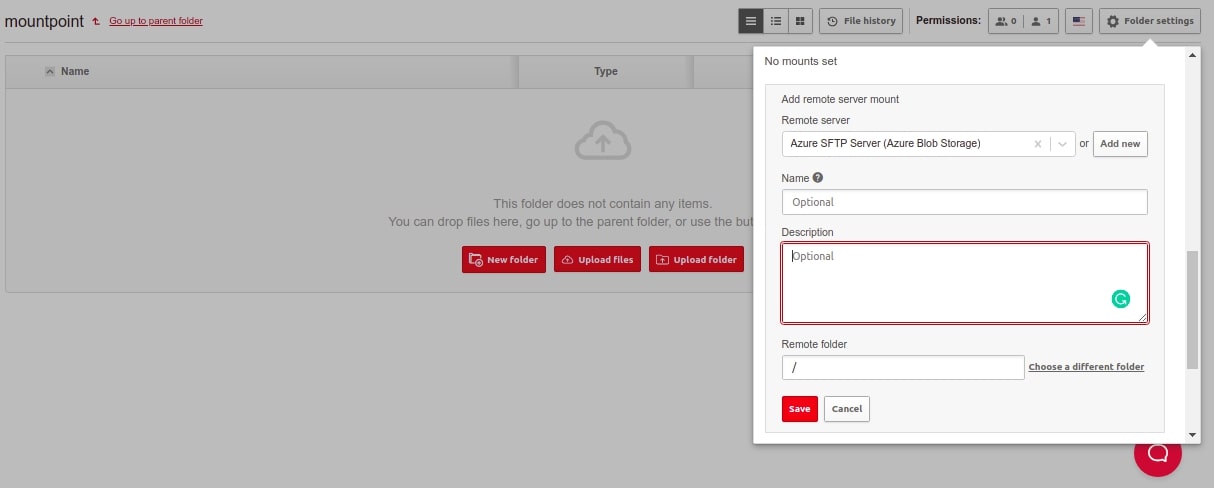
Step 11 – Click on Add new remote server mount. You should see the following screen:
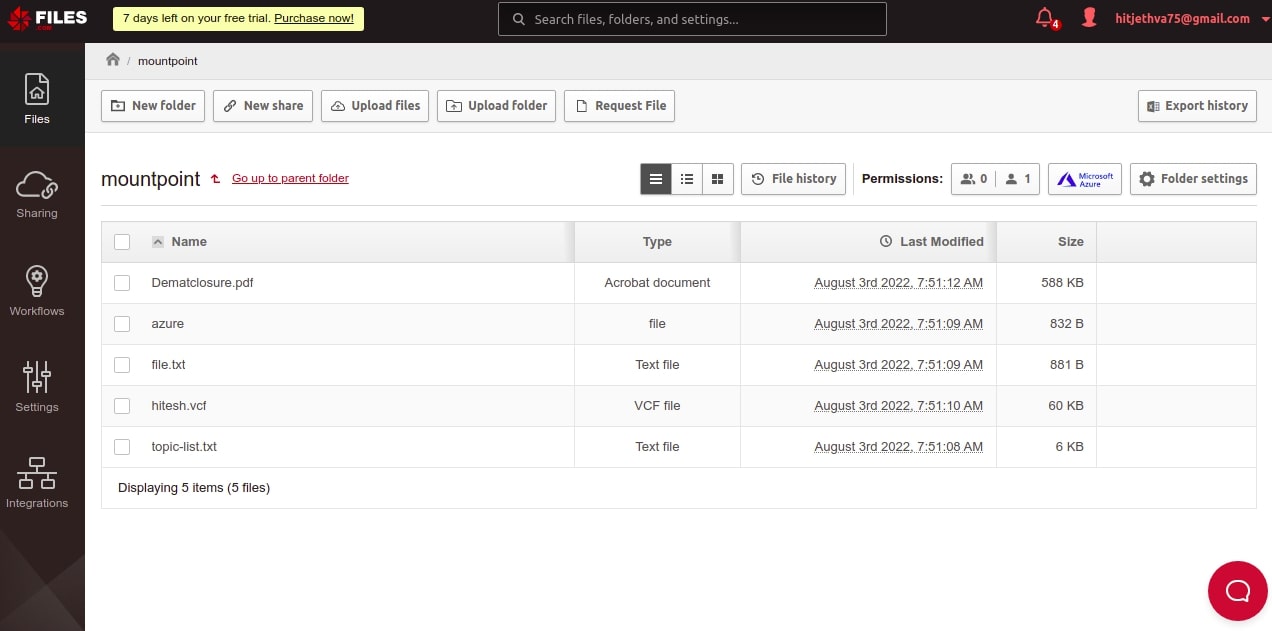
Step 12 – Select Azure blob storage account, provide your root directory path (/), then click on the Save button. After the successful mount, all files from the Azure blob storage are now mounted on Files.com.
Conclusion
In this guide, we set up an Azure Container Service on the Azure portal and then mount the Azure blob storage on the File.com file sharing service. You can now mount, manage and sync your files and folder stored on Azure using the Files.com dashboard.

