Digital communication appears instantly and seamless to us today, but many complex processes happen in the background.
One such process that plays a big role in digital communications is the Simple Network Management Protocol or SNMP for short. This is an application layer protocol defined by the Internet Architecture Board to enable seamless communication between devices connected in the same network. It is also a part of the TCP/IP protocol established by the Internet Engineering Task Force.
From an implementation standpoint, SNMP is the standard protocol used by IP-based devices to communicate with each other on the Internet and at the same time, it’s used to gather metrics that provide deep insights into the health and performance of these devices.
Many organizations and tools rely heavily on SNMP to provide the pertinent data that will help with fault and vulnerability detection and the resultant root-cause analysis. It is also used to evaluate the performance of network devices such as routers, firewalls, printers, switches, and other wireless access points and devices that are SNMP-enabled.
A key advantage with SNMP is that you can automate it to provide the information you want from the network devices using a process called SNMPwalk. This is a simple way to automate the process of gathering specific information from your routers, switches, and other SNMP-enabled network devices. Since it replaces a bunch of GETNEXT requests, you can save time and effort in gathering the information you want. You can even view the OID parameters and set up the required thresholds against each of these values.
Let’s now delve deeper into the SNMPwalk process and commands, along with some real-world examples that you can use in Windows and Linux operating systems.
What is SNMPwalk?
SNMPwalk is the automated process of collecting metrics from your SNMP-enabled devices. It groups together different commands, so you don’t have to send multiple GETNEXT commands to see the available OID parameters or to set threshold values against them.
Typically, this SNMPwalk command is issued to the root node, so the required information can be gathered from every node.
Setting up a SNMPwalk
Setting up a SNMPwalk will automate the process of data collection, and can be divided into three steps.
Step 1: Load the MIB Files
Before we go into the loading process, let’s touch briefly on what MIB and OID are.
Management Information Base, or MIB, is a collection of information about the different devices and these are organized hierarchically. OIDs or Object Identifiers, as the name suggests, help us to identify a specific SNMP-enabled object on a network. These OIDs are also structured and follow a hierarchical pattern.
Now let’s link the two concepts. Every device has an OID for specific information such as status, availability, etc. In other words, device A can have three OIDs, one for status, availability, and performance respectively.
MIB is a database or a collection of OIDs that make it easy to find what you want. Every device has its MIB table and possibly many OIDs within it. A key role of the MIB table is to create the human-readable form of an OID. For example, if the OID is 1.3.8.4, the MIB helps you to understand that this means a particular device is available.
So, your SNMP agent must navigate to the OID and look up its value in the MIB table to give information about the health or performance of a device.
Now that you know what OIDs and MIBs are, make sure to add the MIB files, so you can easily find what you want. Every manufacturer will have specific implementations, so refer to the device manual or contact the manufacturer for the exact process.
While this is not mandatory, it can be easier to run the SNMPwalk when you have the MIB tables in place, especially when you plan to run SNMPwalk manually, without the use of third-party devices.
Step 2: Add and Enable the Host
In the next step, add the host you want to monitor, and enable SNMP monitoring for the same.
If you’re planning to use a tool for SNMP monitoring, navigate to its user interface where you should be able to add the host with its IP, so you can enable SNMP monitoring for it. You may also have to add the port and the SNMP version, so keep this information handy.
Finally, test the SNMP connection after setting up the device.
Please note that this is an optional step and may not be required for devices that automatically come enabled with SNMP monitoring.
Step 3: Set up SNMPwalk
Finally, install the SNMPwalk on your device. If you have Windows users, you can download snmpwalk.exe from https://sourceforge.net/projects/net-snmp/files/net-snmp/.
On Linux, the SNMPwalk comes as a package, so you can install it directly. But the exact installation process depends on the Linux version you use.
How to use SNMPwalk?
Now that you have SNMPwalk installed, you can start using it through your command-line interface.
To start, the different options/parameters you can use with this command are listed:
| -h | Displays the help menu |
| -H | Shows the configuration file directives |
| -v | Specifies the SNMP version |
| -c | Sets the community string |
| -a | Sets the authentication protocol |
| -A | Sets the authentication protocol passphrase |
| -e | Sets the security engine ID |
| -E | Sets the context engine ID |
| -l | Sets the security level |
| -n | Sets the context name |
| -Os | Displays only the last symbolic element of the OID |
| -u | Sets the security name |
| -v | Specifies the SNMP version that must be used |
| -x | Sets the privacy protocol |
| -X | Sets the privacy protocol passphrase |
| -Z | Sets the destination engine boots/time |
Using this combination of different parameters you can get the information you want.
Examples of SNMPwalk Commands
Let’s now look at some examples of SNMPwalk commands that you can use in both Windows and Linux.
Examples for Windows
| Purpose | Command |
|---|---|
| Checking the availability of an operating system update using SNMPv1 | snmpget -v1 -c [Community string] [IP address] [OID] |
| Checking the availability of an operating system update using SNMPv2 | snmpget -v2c -c [Community string] [IP address] [OID] |
| Using SNMPv3 that requires no authentication/encryption | snmpget -v3 -l noAuthNoPriv -u [User name] [IP address] [OID] |
| Test the connectivity and community string | snmpwalk -Os -c public -v 2c [Community String] |
Examples for Linux
| Purpose | Command |
|---|---|
| Getting the hostname | snmpwalk -v 2c -c public [Community String] sysname |
| Getting the CPU type | snmpwalk -v 2c -c public [Community Strong][OID] |grep -i cpu |
As you can see, the big advantage with SNMpwalk is that you don’t have to type multiple GETNEXT commands to get the information you want. So, this saves time and also, helps you to quickly stay on top of the health of your network devices.
A quick tip: When you use MIBs, you can see the specific information you want instead of the data collected from all the object IDs.
Well, if all these sound complicated, you can always opt for third-party tools as they have the capabilities to monitor your OIDs and MIBs from a user-friendly interface.
Let’s briefly look at a few tools to give you an idea.
1. SolarWinds MIB Walk – FREE TRIAL
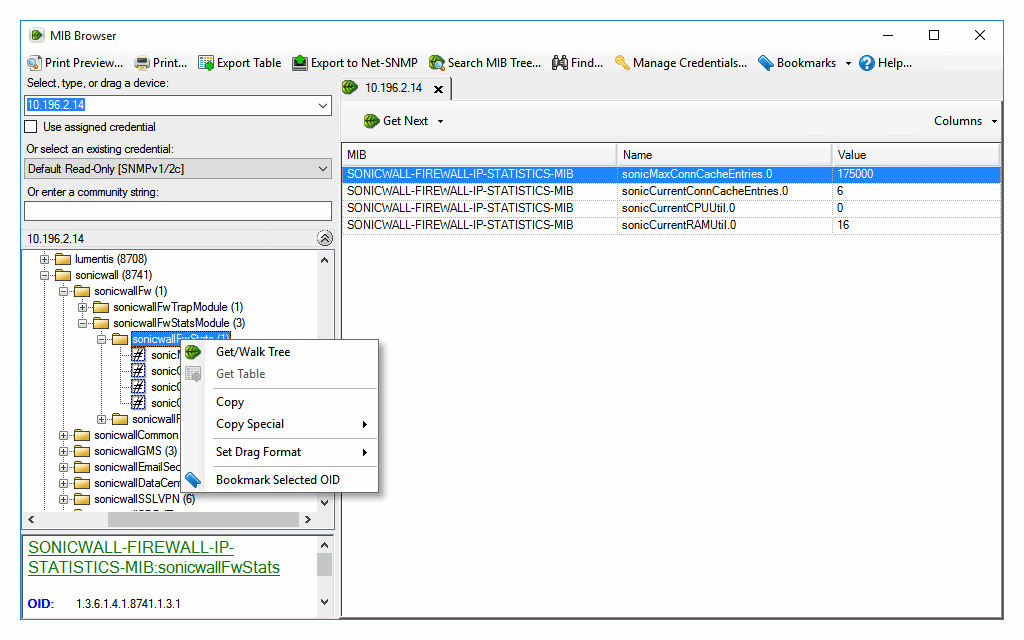
SolarWinds MIB Walk is a part of the Engineer’s Toolset suite and it displays a complete list of all MIBs and OIDs. And of course, you can search through them or change parameters to zero in on what you want.
Key Features
Some of the salient features of this tool are:
- Pulls the value of every OID in the supported MIB
- Taps into the SolarWinds MIB database which has more than a million unique OIDs to verify the common name
- Supports network products from multiple vendors
- Quickly generates a report on the current status of every OID.
Unique feature
Unlike many of its counterparts, SolarWinds MIB Walk boasts access to an expansive MIB database, ensuring users have one of the most exhaustive lists of OIDs at their fingertips. Its compatibility with diverse vendor products also distinguishes it from competing SNMPwalk tools.
Why do we recommend it?
SolarWinds MIB Walk’s immense strength lies in its ability to tap into an extensive database of over a million OIDs. Its integration with the Engineer’s Toolset suite ensures a comprehensive and efficient approach to network management. This tool’s precision in listing and status reporting of OIDs makes it a top choice for administrators working with SNMP frequently.
Who is it recommended for?
SolarWinds MIB Walk is tailor-made for network engineers and IT professionals who require an in-depth understanding of their network’s MIBs and OIDs—especially suited for those managing multi-vendor environments and needing quick status reports on OIDs.
Pros:
- Helps Monitor Network Availability and Health Status
- Runs thorough Network Diagnostics
- Enhanced Security
- Easy-to-Use Interface
- Generates a comprehensive list of all supported MIBs and OIDs
Cons:
- Does not support IPV6
- Does not support SNMPv1 and SNMP v3 Context configuration
The Engineer’s Toolset is priced at $1,585 onwards and there’s a fully functional 14-day free trial.
Download: Click here for a fully functional 14-day-free trial.
2. Paessler PRTG
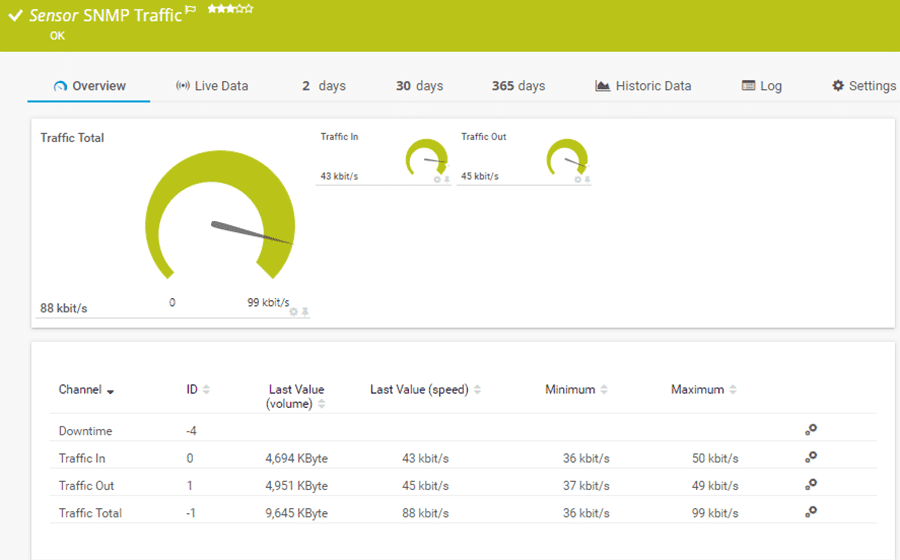
PRTG from Paessler is a sensor-based tool that can monitor your SNMP devices and give the information you want from MIBs and OIDs.
Key Features
Here’s a look at the capabilities of PRTG when it comes to monitoring your SNMP devices.
- Quick and reliable
- Compatible with most devices
- Provides valuable insight into the performance and availability of devices in your network
- Helps with capacity planning by providing relevant information
Unique feature
What differentiates PRTG is its sensor-based methodology. While many tools gather data, PRTG’s use of customizable sensors ensures precision and granularity in the information it retrieves, especially in real-time monitoring scenarios.
Why do we recommend it?
Paessler PRTG stands out for its sensor-based architecture, ensuring accurate, timely, and flexible SNMP device monitoring. Its strength lies in providing meaningful insights into network device performance, making it a great option for any size network.
Who is it recommended for?
Ideal for network administrators and IT professionals seeking a reliable SNMP monitoring solution that delivers concise and actionable insights. It’s especially suited for those looking to use SNMPwalk to access network size for capacity planning.
Pros:
- Helps manage entire IT Infrastructure
- Offers Bandwidth Monitoring
- Autodiscovery
- Generates Quick Insights
- Supports different alert options
Cons:
- In terms of the hierarchy, the web GUI’s navigation should be a little clearer.
- Paessler PRTG offers several features that may take time to understand
The cost depends on the number of objects you want to monitor with the first 100 sensors free. Click here to get started.
Conclusion
SNMPwalk is a handy way to execute multiple GETNEXT commands to get information about your SNMP-enabled devices. You can choose to download SNMP monitoring and run SNMPwalk from your command-line interface or use third-party tools that come with an easy-to-use interface. Either way, you’re sure to save a ton of time and effort, and at the same time, get the information you want to stay on top of the health and performance of all SNMP-enabled devices on your network.
Related Post: Best Wake On Lan Software


